Ethereum mainnet
Ethereum stands as a titan in the realm of smart contract platforms. Its monumental shift from Proof of Work (PoW) to Proof of Stake (PoS) has opened up opportunities for individuals to participate in Ethereum's block production by staking ETH.
Dappnode simplifies your journey to becoming a Solo Staker and start earning. You will need to do 3 main tasks, broken down below:
- Install the necessary packages on Dappnode
- Create validator keys
- Deposit ETH into the Ethereum deposit contract
1. Install the necessary packages on Dappnode
Dappnode makes it super simple to install everything you need to run a validator. Via the Stakers UI you will be able to install the following packages:
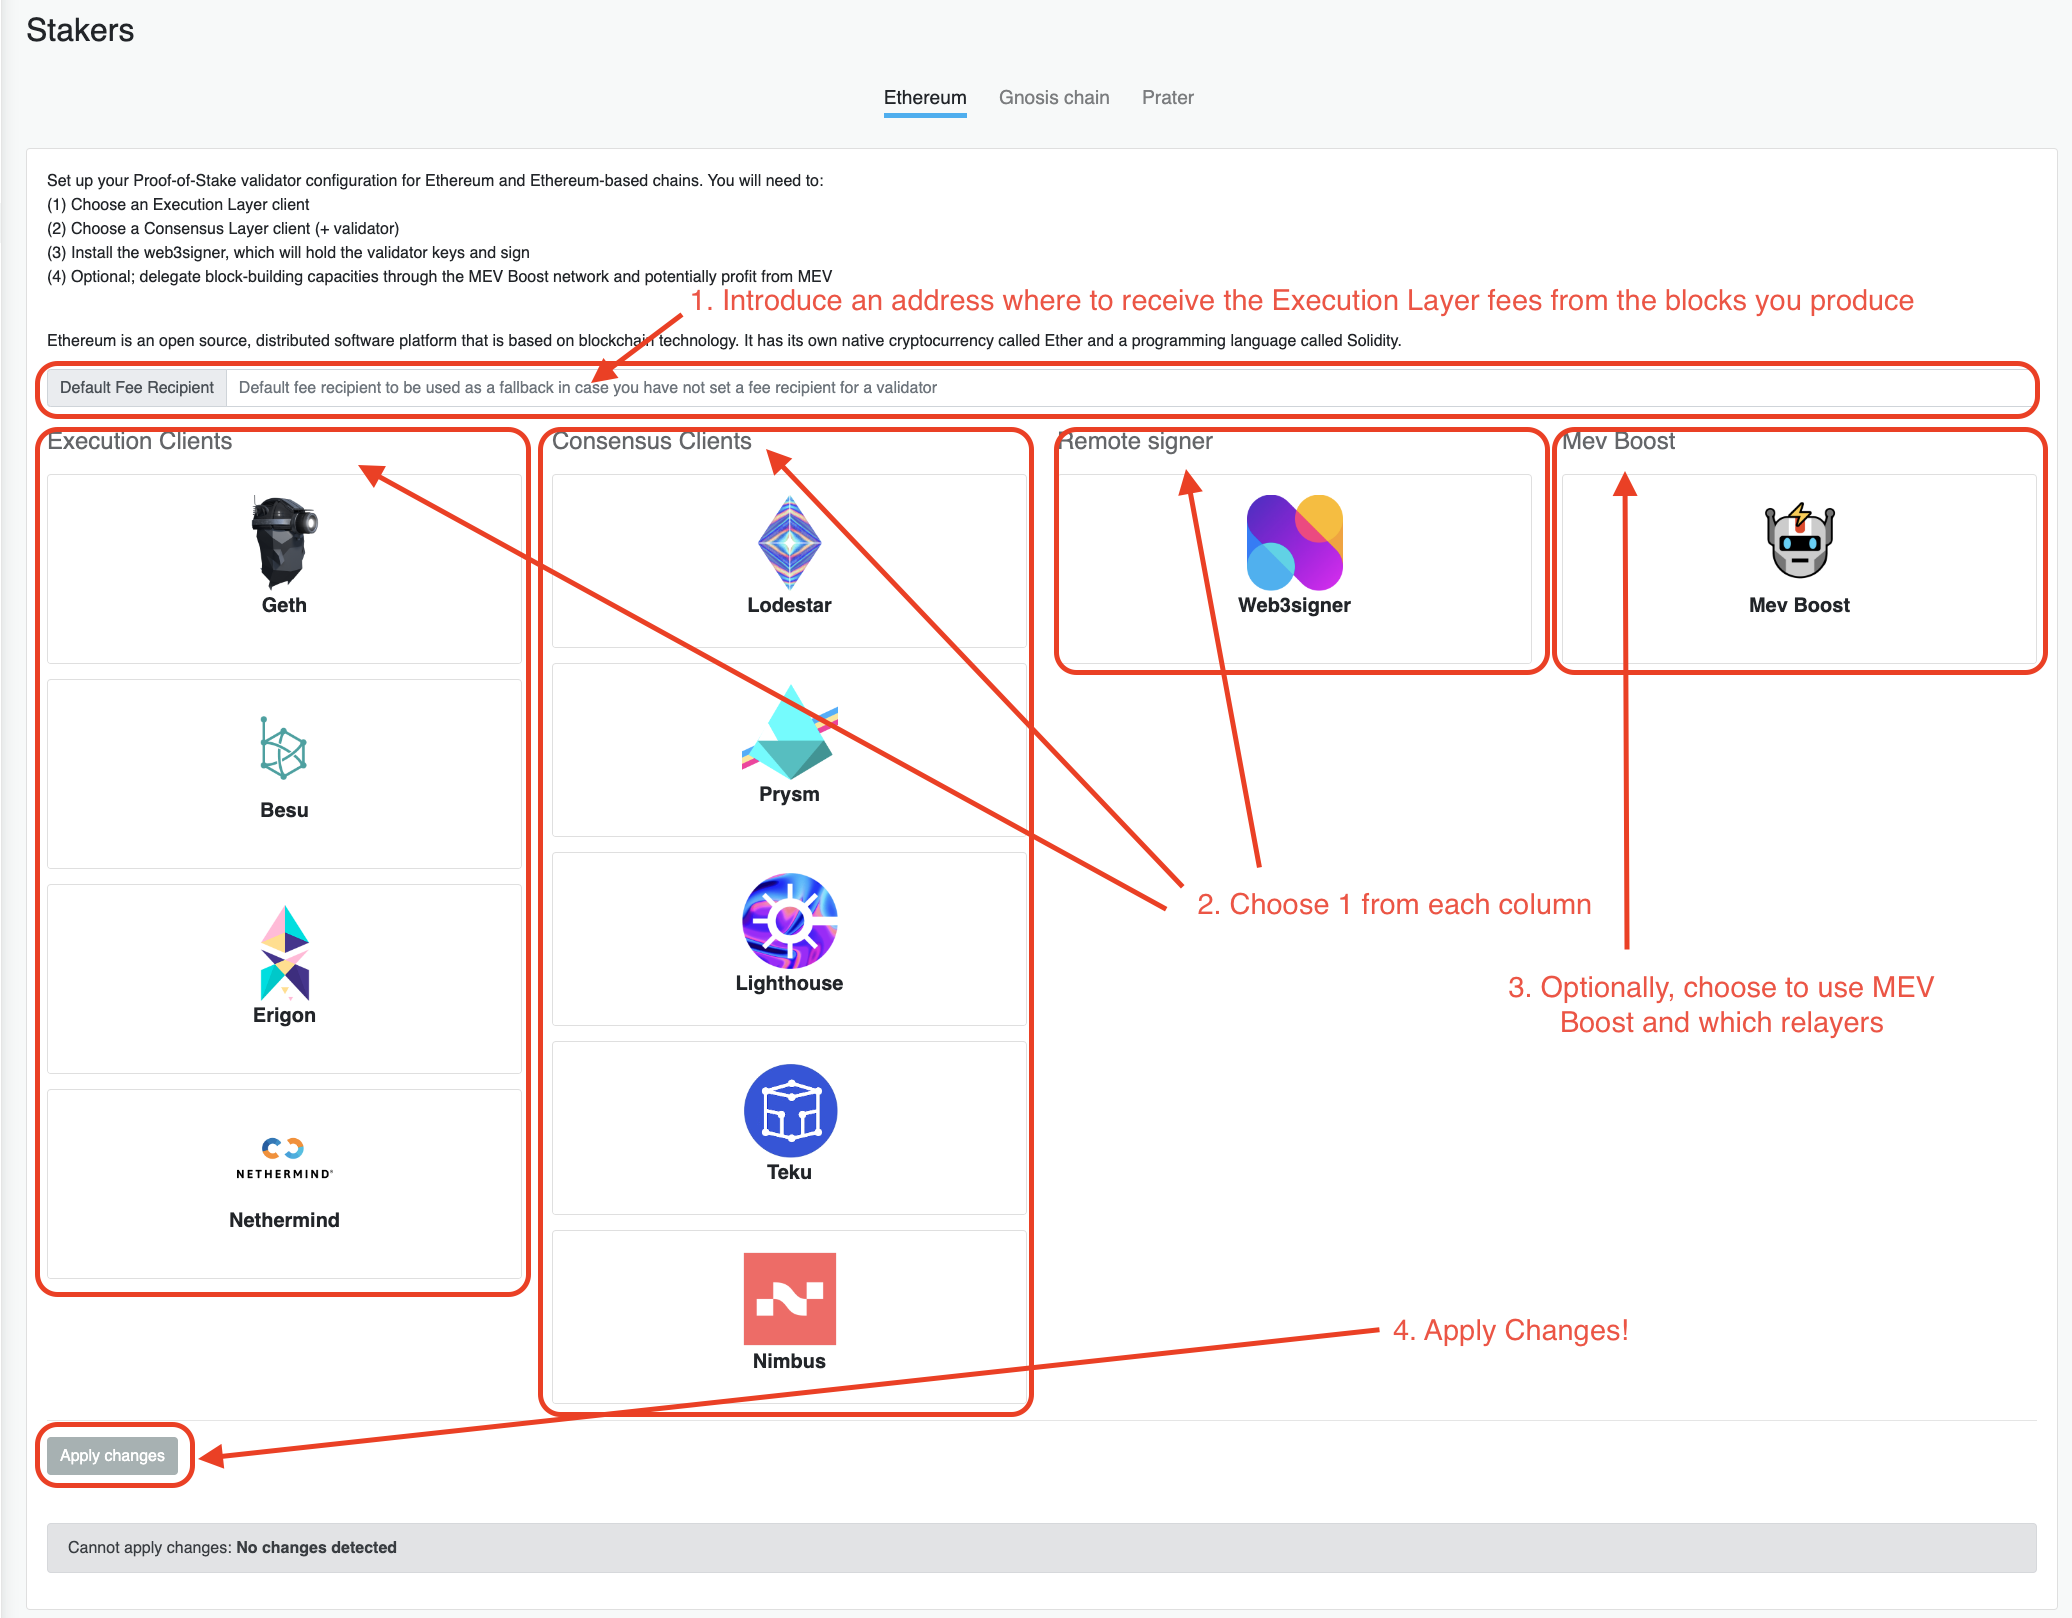
- Execution Client (Choose one): Geth, Nethermind, Erigon, or Besu.
- Consensus Client (Choose one): Prysm, Lighthouse, Teku, Nimbus, or Lodestar.
Erigon is an execution client that focuses on retrieving and storing more data than the default options of other clients. This is useful to run historical queries or to use apps that require tracing/archive nodes like Otterscan or Trueblocks. Make sure you have at least 3 TB free in your hard drive to run Erigon.
Execution clients take a long time to sync. Hence, once you start staking with one you will most likely stick with it. However, you can switch consensus clients at any time thanks to the magic of "checkpoint sync". Make sure to toggle the "use checksync" option when installing your consensus client, and you can change at any point from one to another with barely any downtime.
After syncing your consensus client, the execution client starts its synchronization process. This can take a few hours, so patience is essential. For clarity or troubleshooting, consult your execution client's logs.
MEV Boost is an extra piece of software not belonging to the core Ethereum stack. It allows your validator to receive blocks that have been created by special "block builders" that try to extract MEV from the network, and receive extra rewards for including them in the chain when it's your turn to propose a block. However, it is very new technology and can be risky to use.
2. Creating the keys for your validator
This guide will use the Wagyu keygen tool to generate your validator keys. There are other options like a command-line tool by the Ethereum Foundation, but they are harder to use.
🔒 Validator keys will be online (stored in your Dappnode) and signing the blocks of the chain. You will create them from a mnemonic phrase, which is important to keep safe as it's the only way to regenerate these validator keys if you lose them.
🛡️ The damage of getting your mnemonic phrase compromised has been reduced dramatically since withdrawals have been activated, as you can create the keystores with a set withdrawal address and nobody can change that after, even if they get to your mnemonic phrase. Nevertheless, if you lose the keystore and the mnemonic, you will not be able to sign an exit message and you will be forced to validate forever.
🔑 Withdrawal address this brings us to the withdrawal address, which is the address that will receive all the balance above 32 ETH while your validator is active, and all your balance above 0 ETH when you exit the validator set. You need to keep this address safe as it's where your ETH will go, and cannot be changed.
-
Download the latest release of the Wagyu Key Gen from here.
-
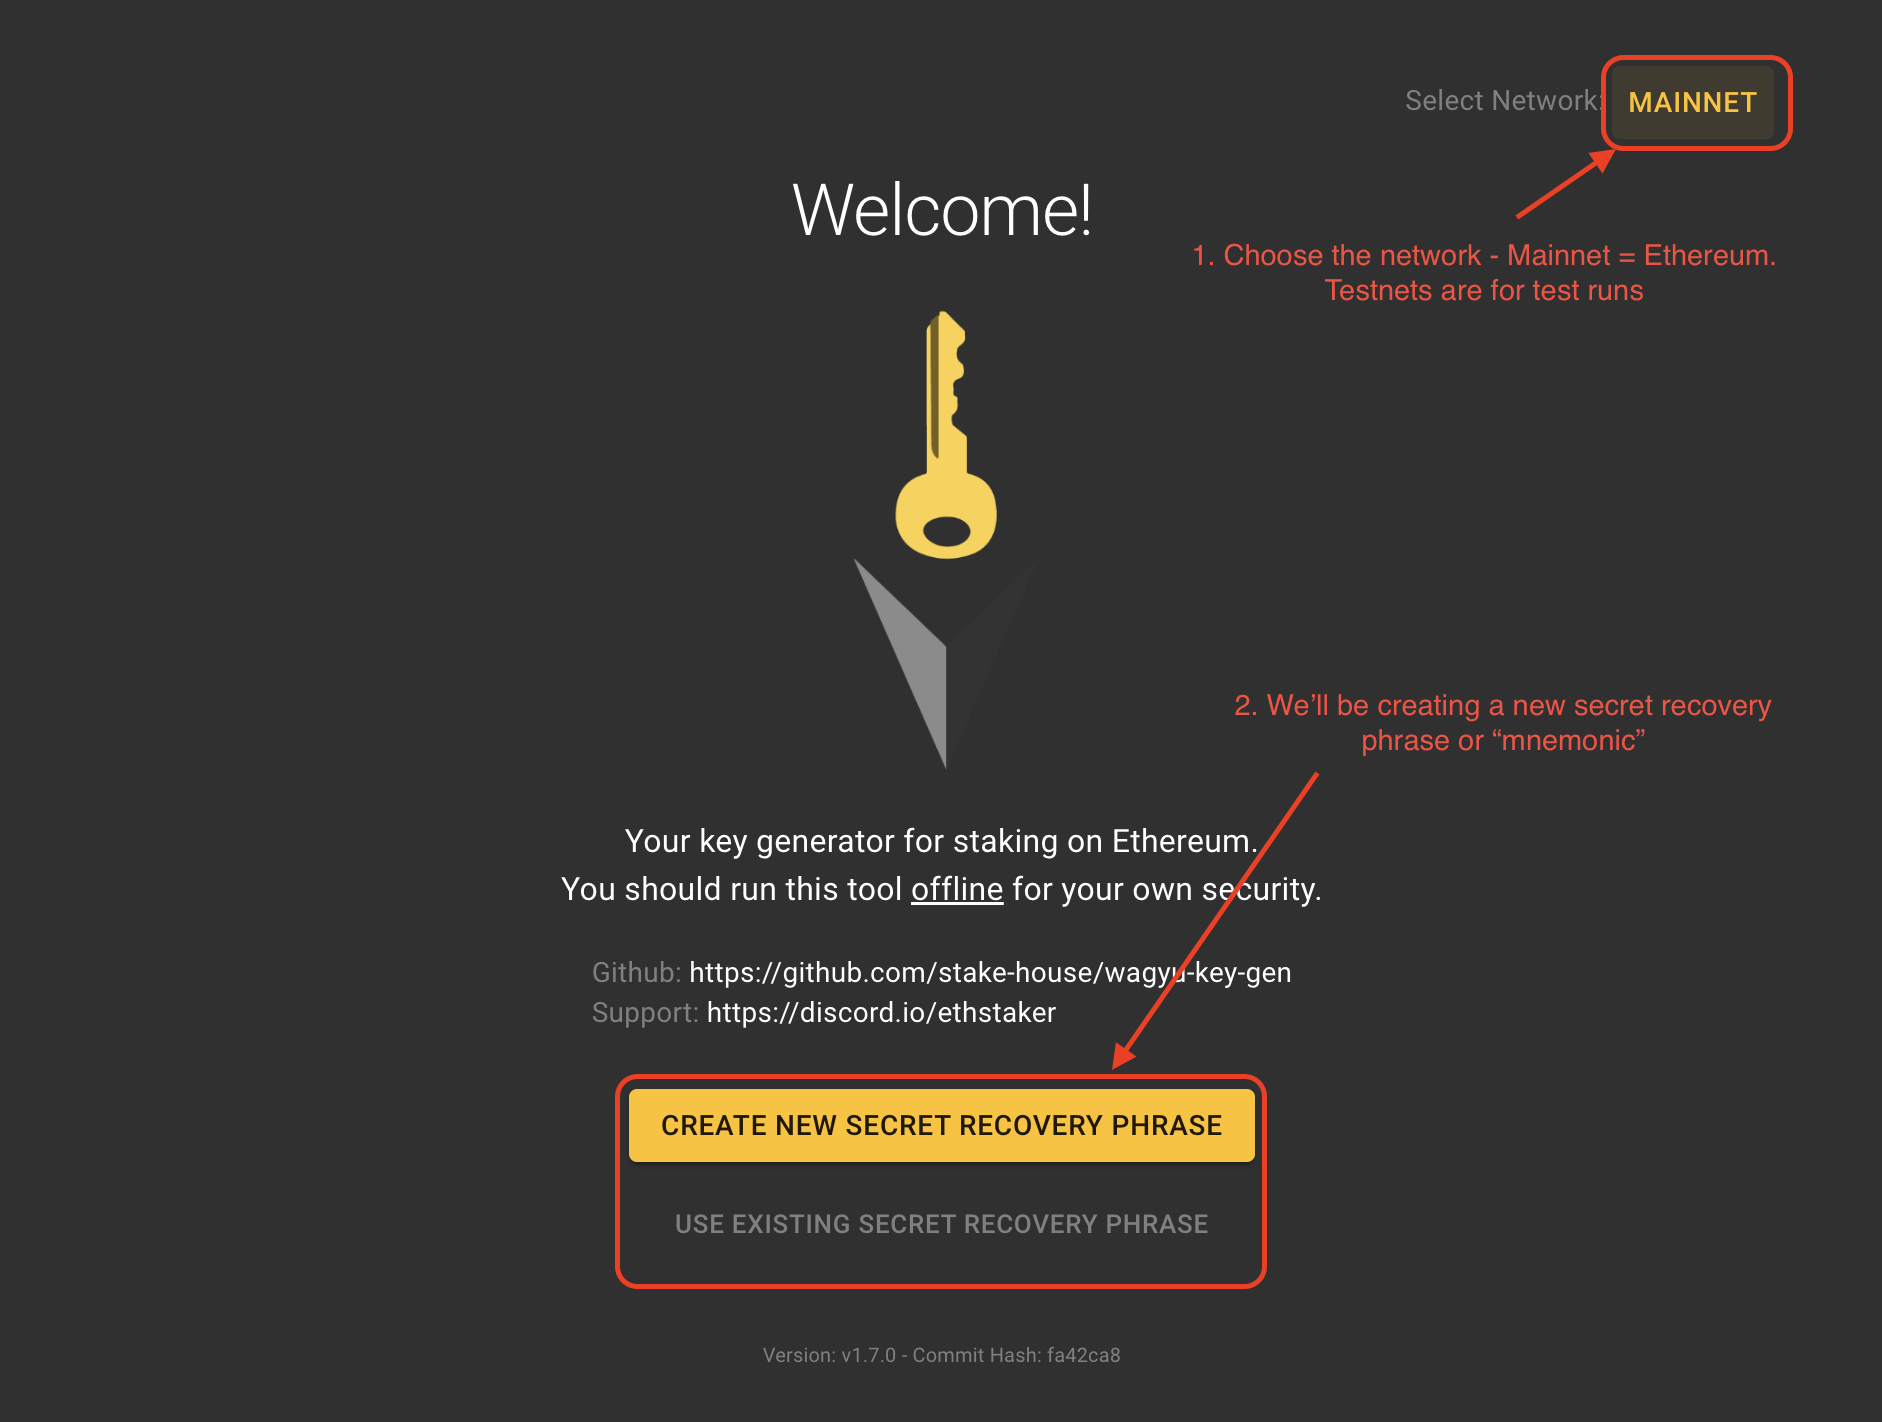
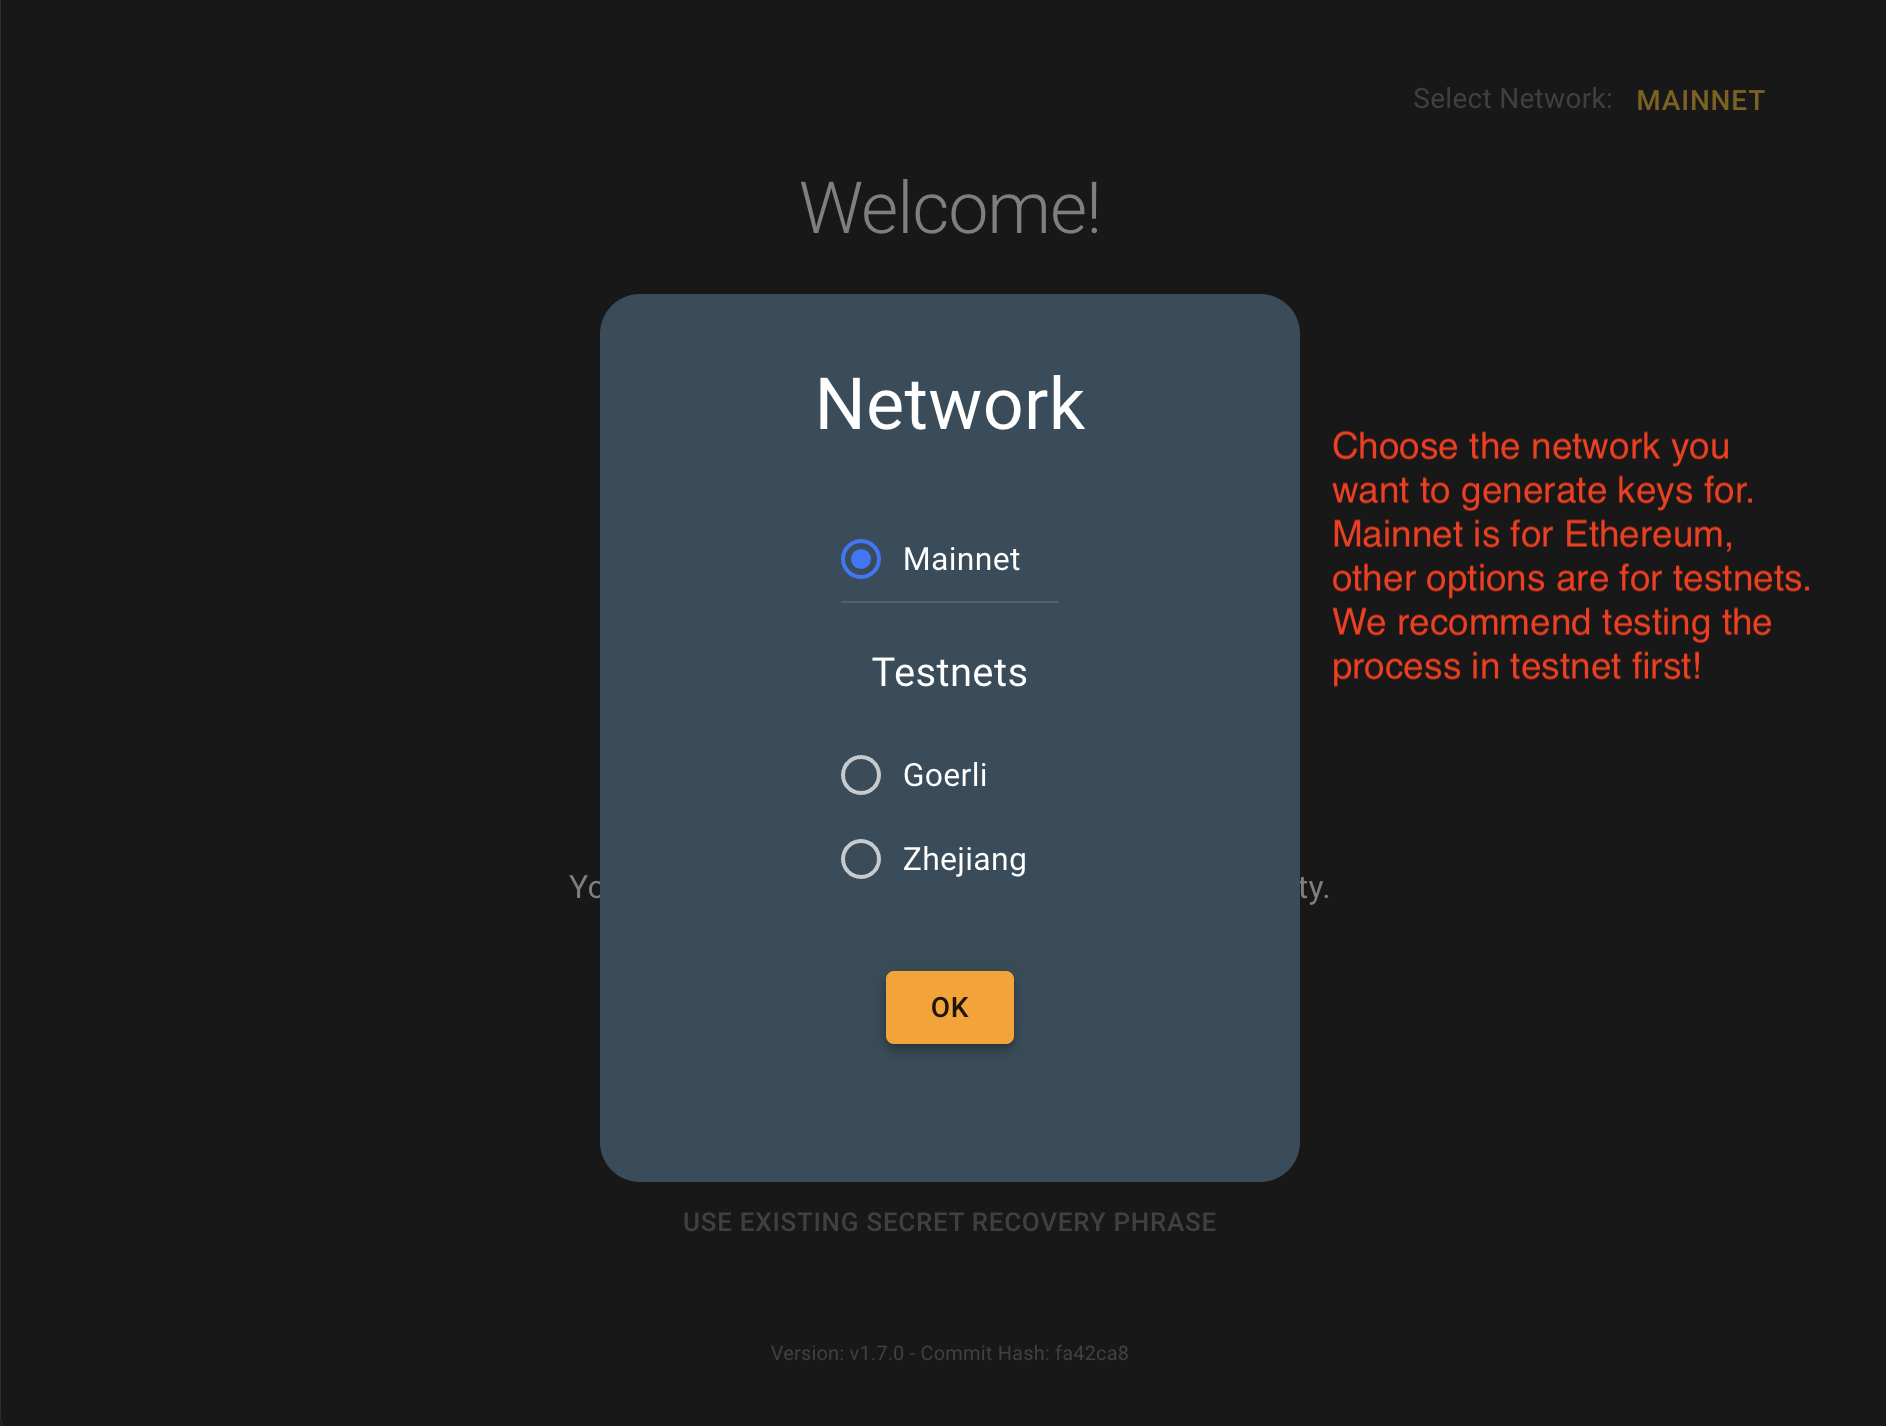
Disconnect from the internet, so it will be harder to have any leaks on the information you use, and open the program. You will be given 2 options, either create a new mnemonic or import an existing mnemonic, and you will be able to choose the network for which you are generating the keys. The GUI is very user friendly and explains all steps along the way.
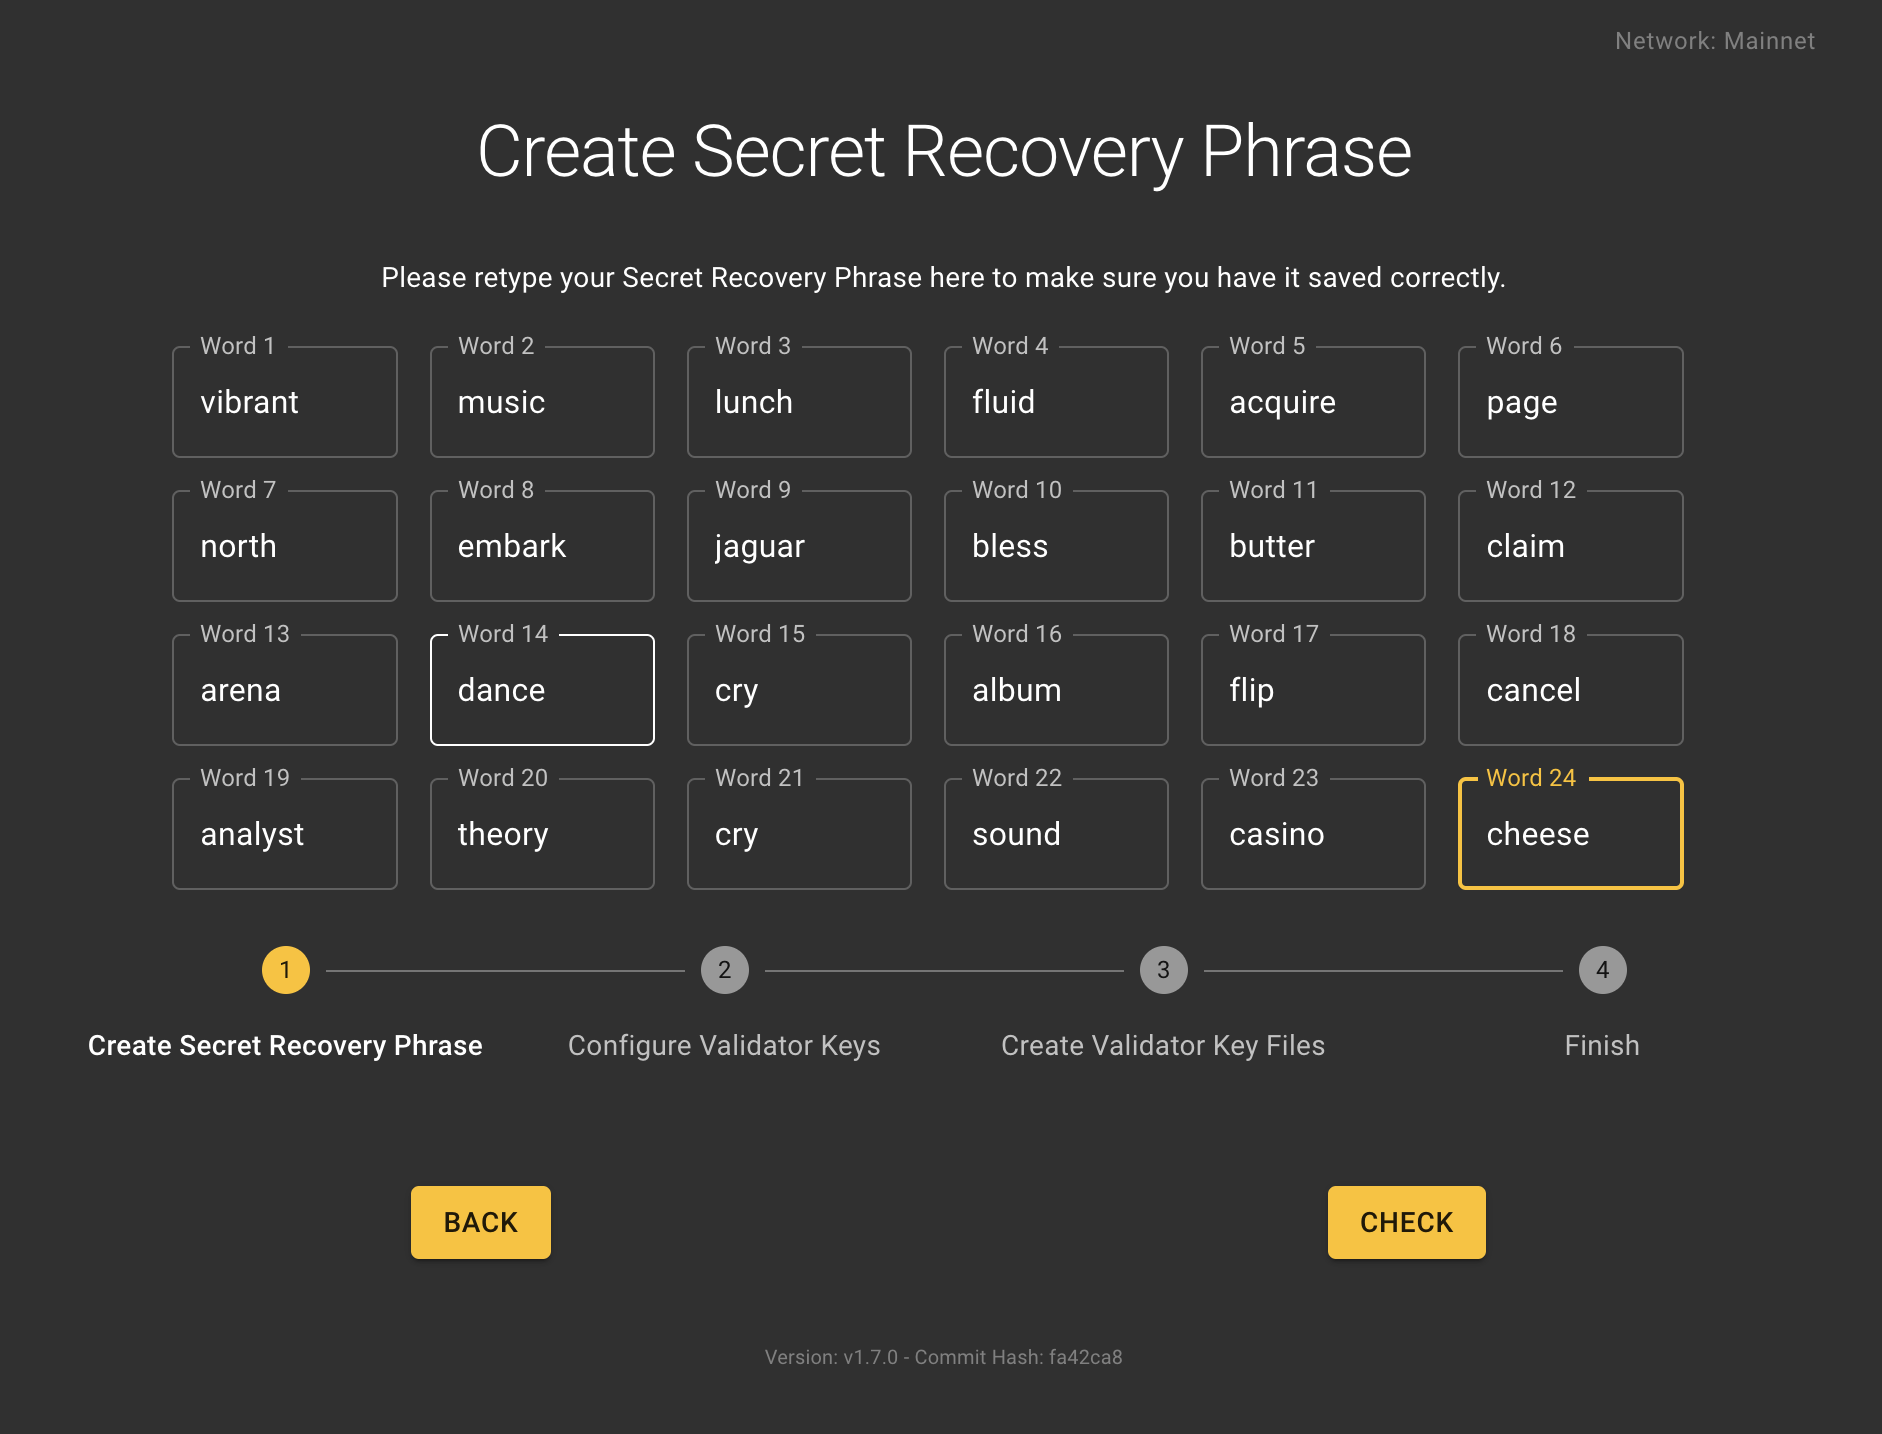
You will be shown your Mnemonic Phrase. Keep it safe, as it is used to recreate the validator keys! We recommend copying it in an encrypted volume or in paper stored in a safe place.
To ensure that you have copied it somewhere, it will ask you to type it again.
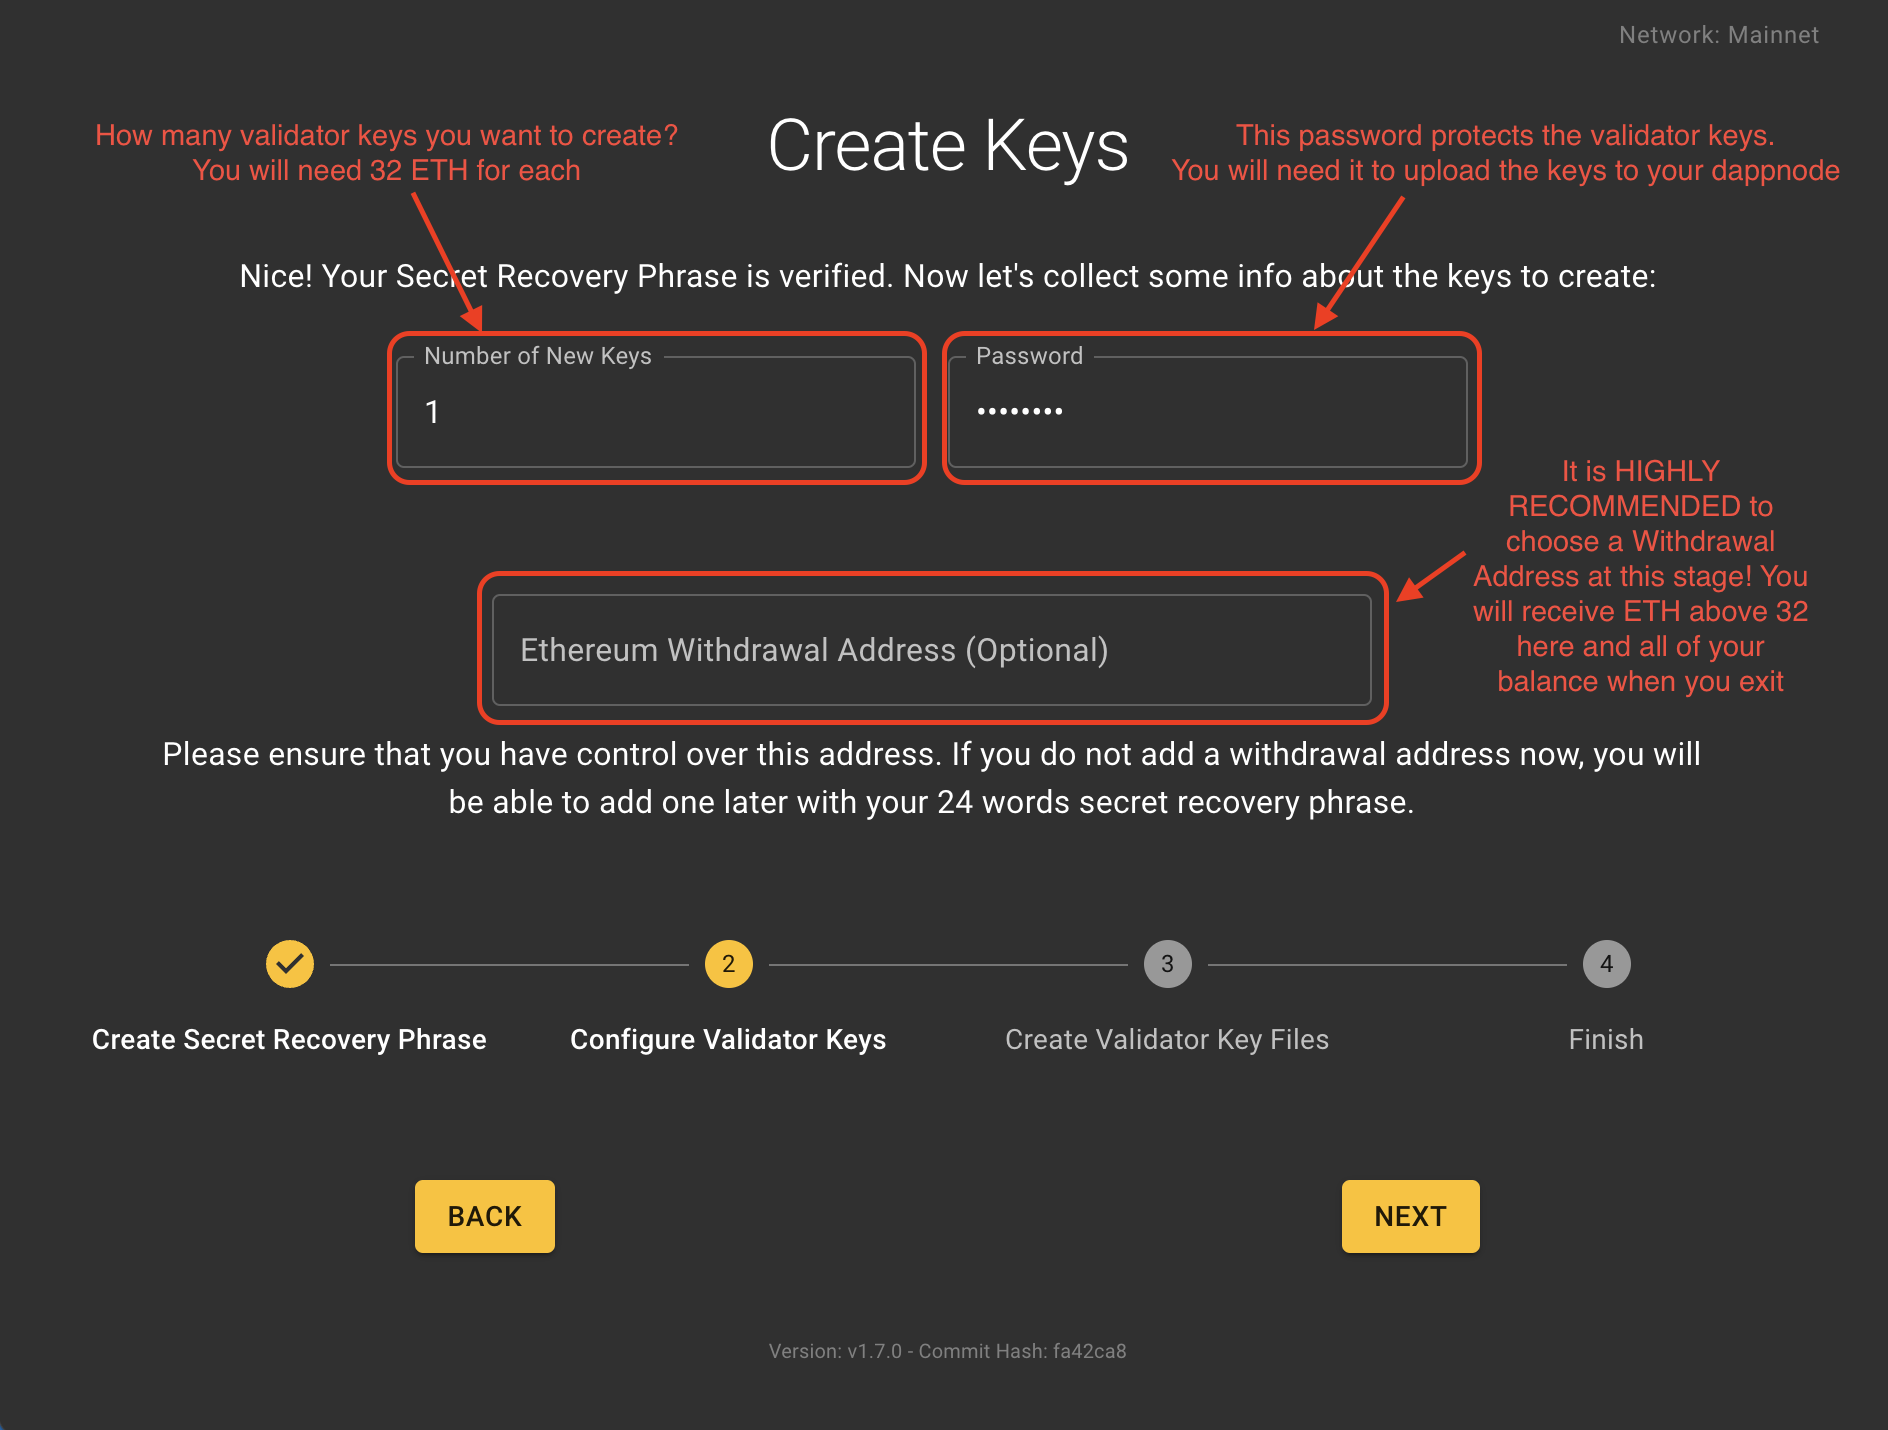
Choose 1) How many keys you want to create, 2) the password to protect the keys and 3) the Withdrawal Address where your Consensus Layer profits will be sent.
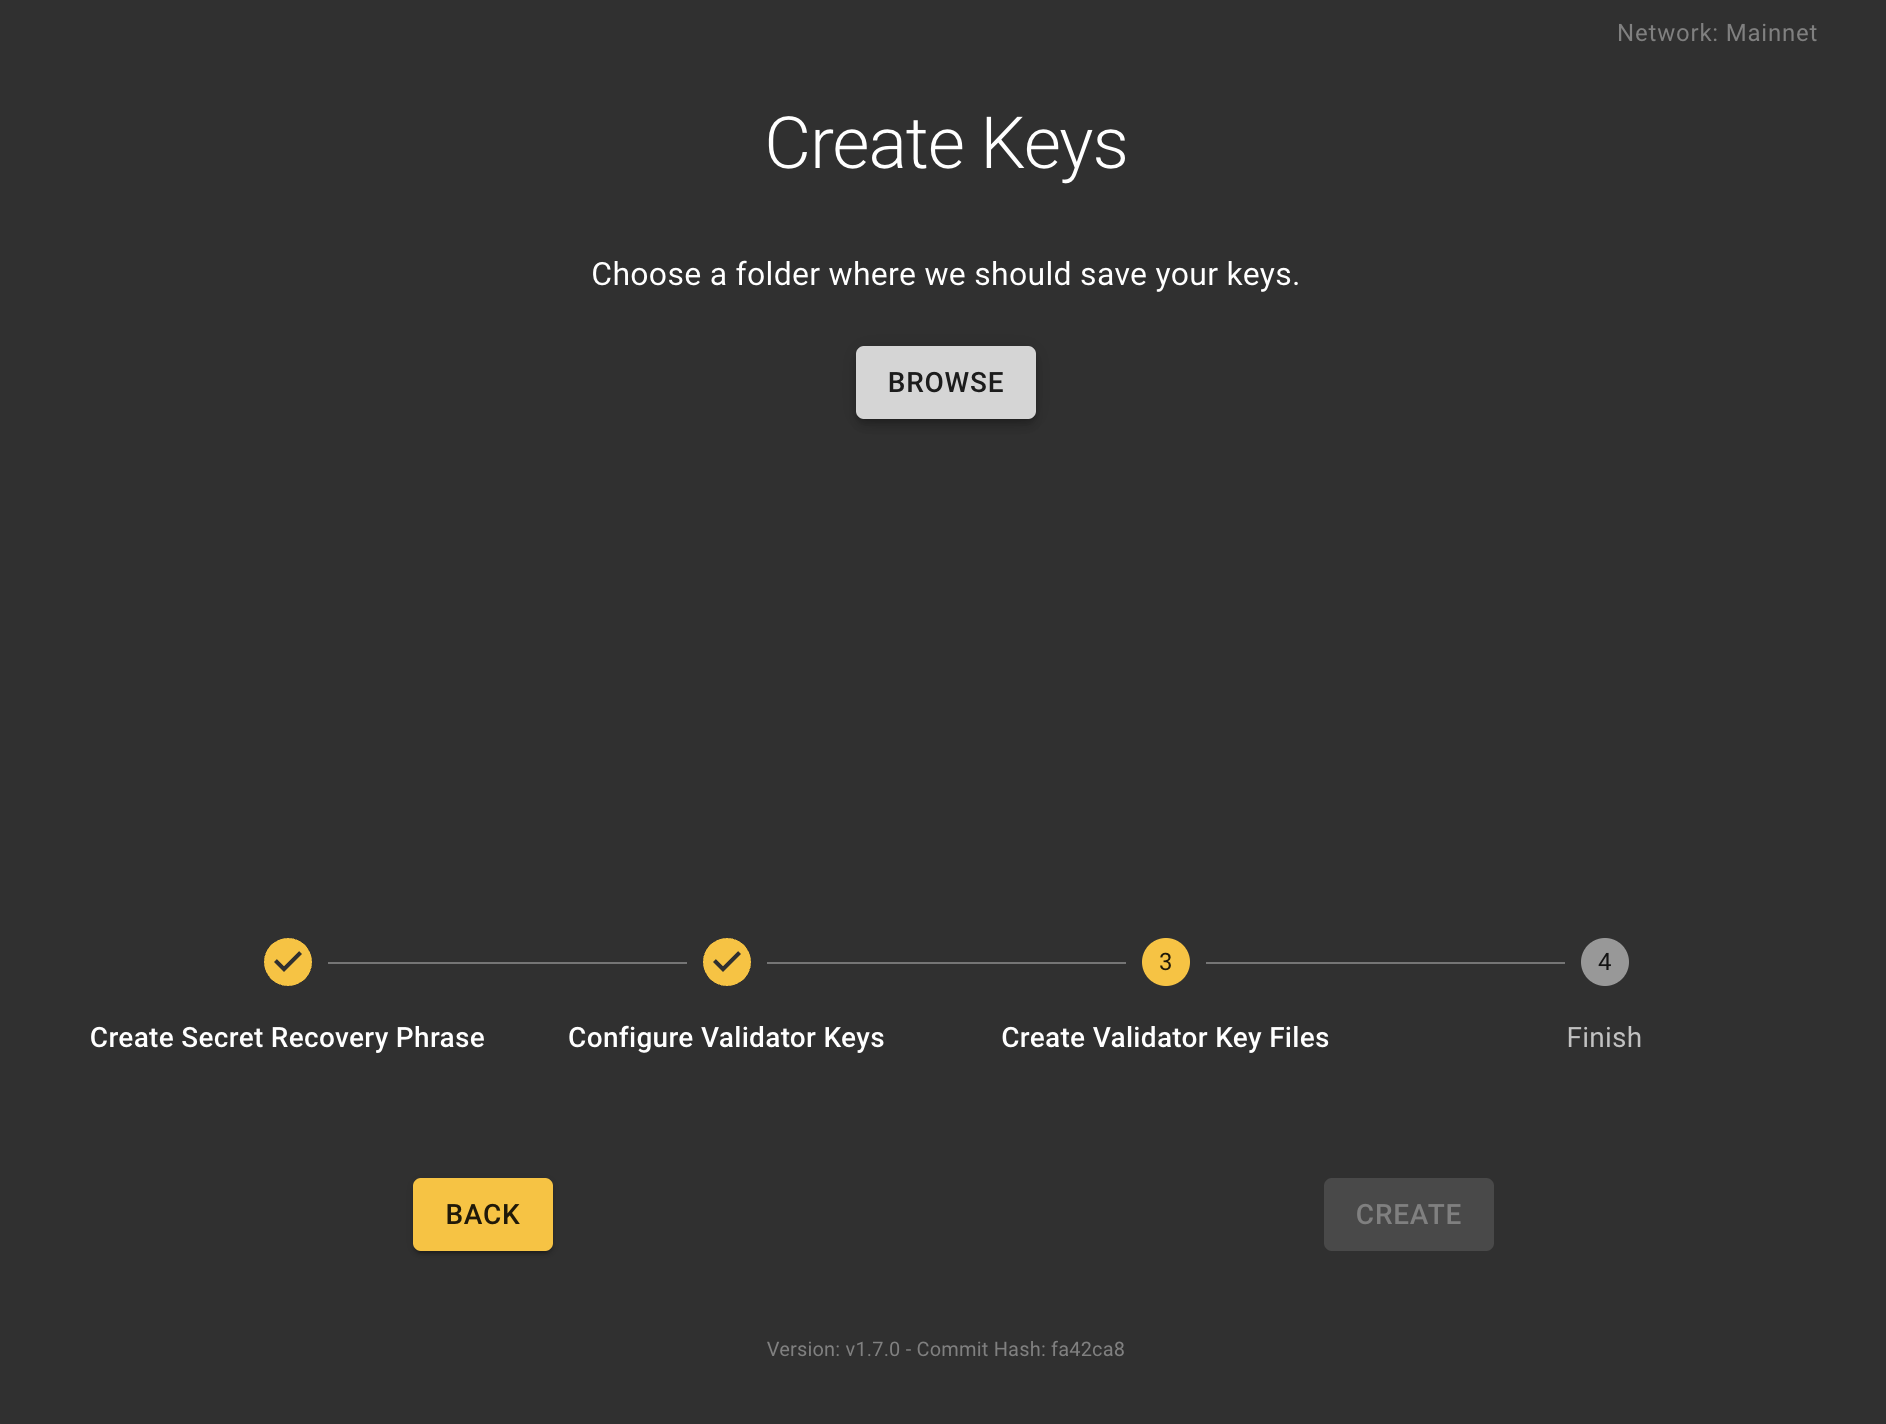
Select a folder where to save the keys
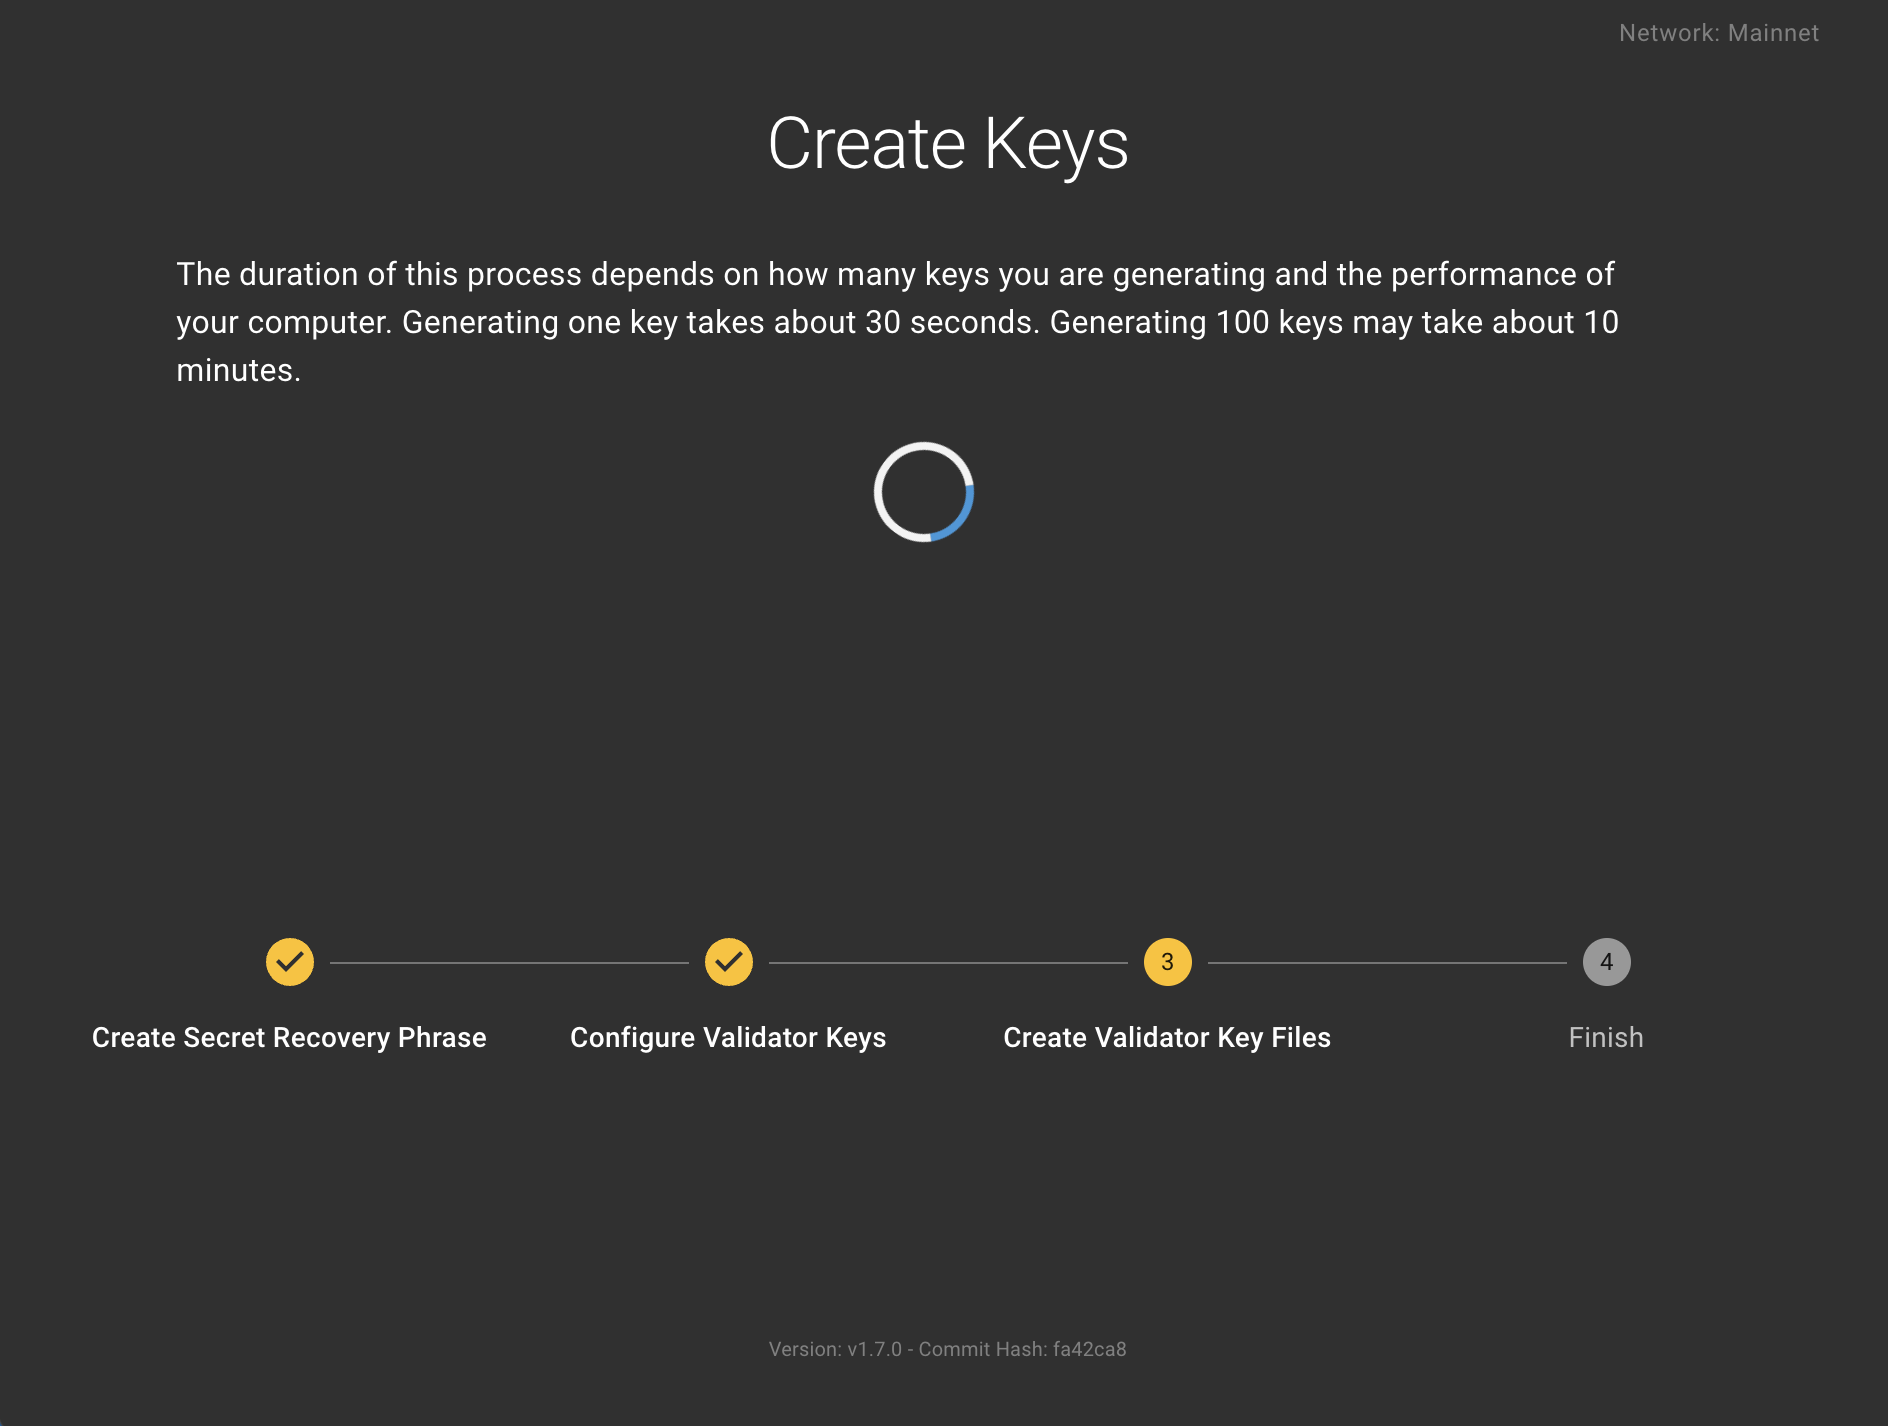
Wait for the keys to be generated
And you are done! You will find your keys in the folder you selected.
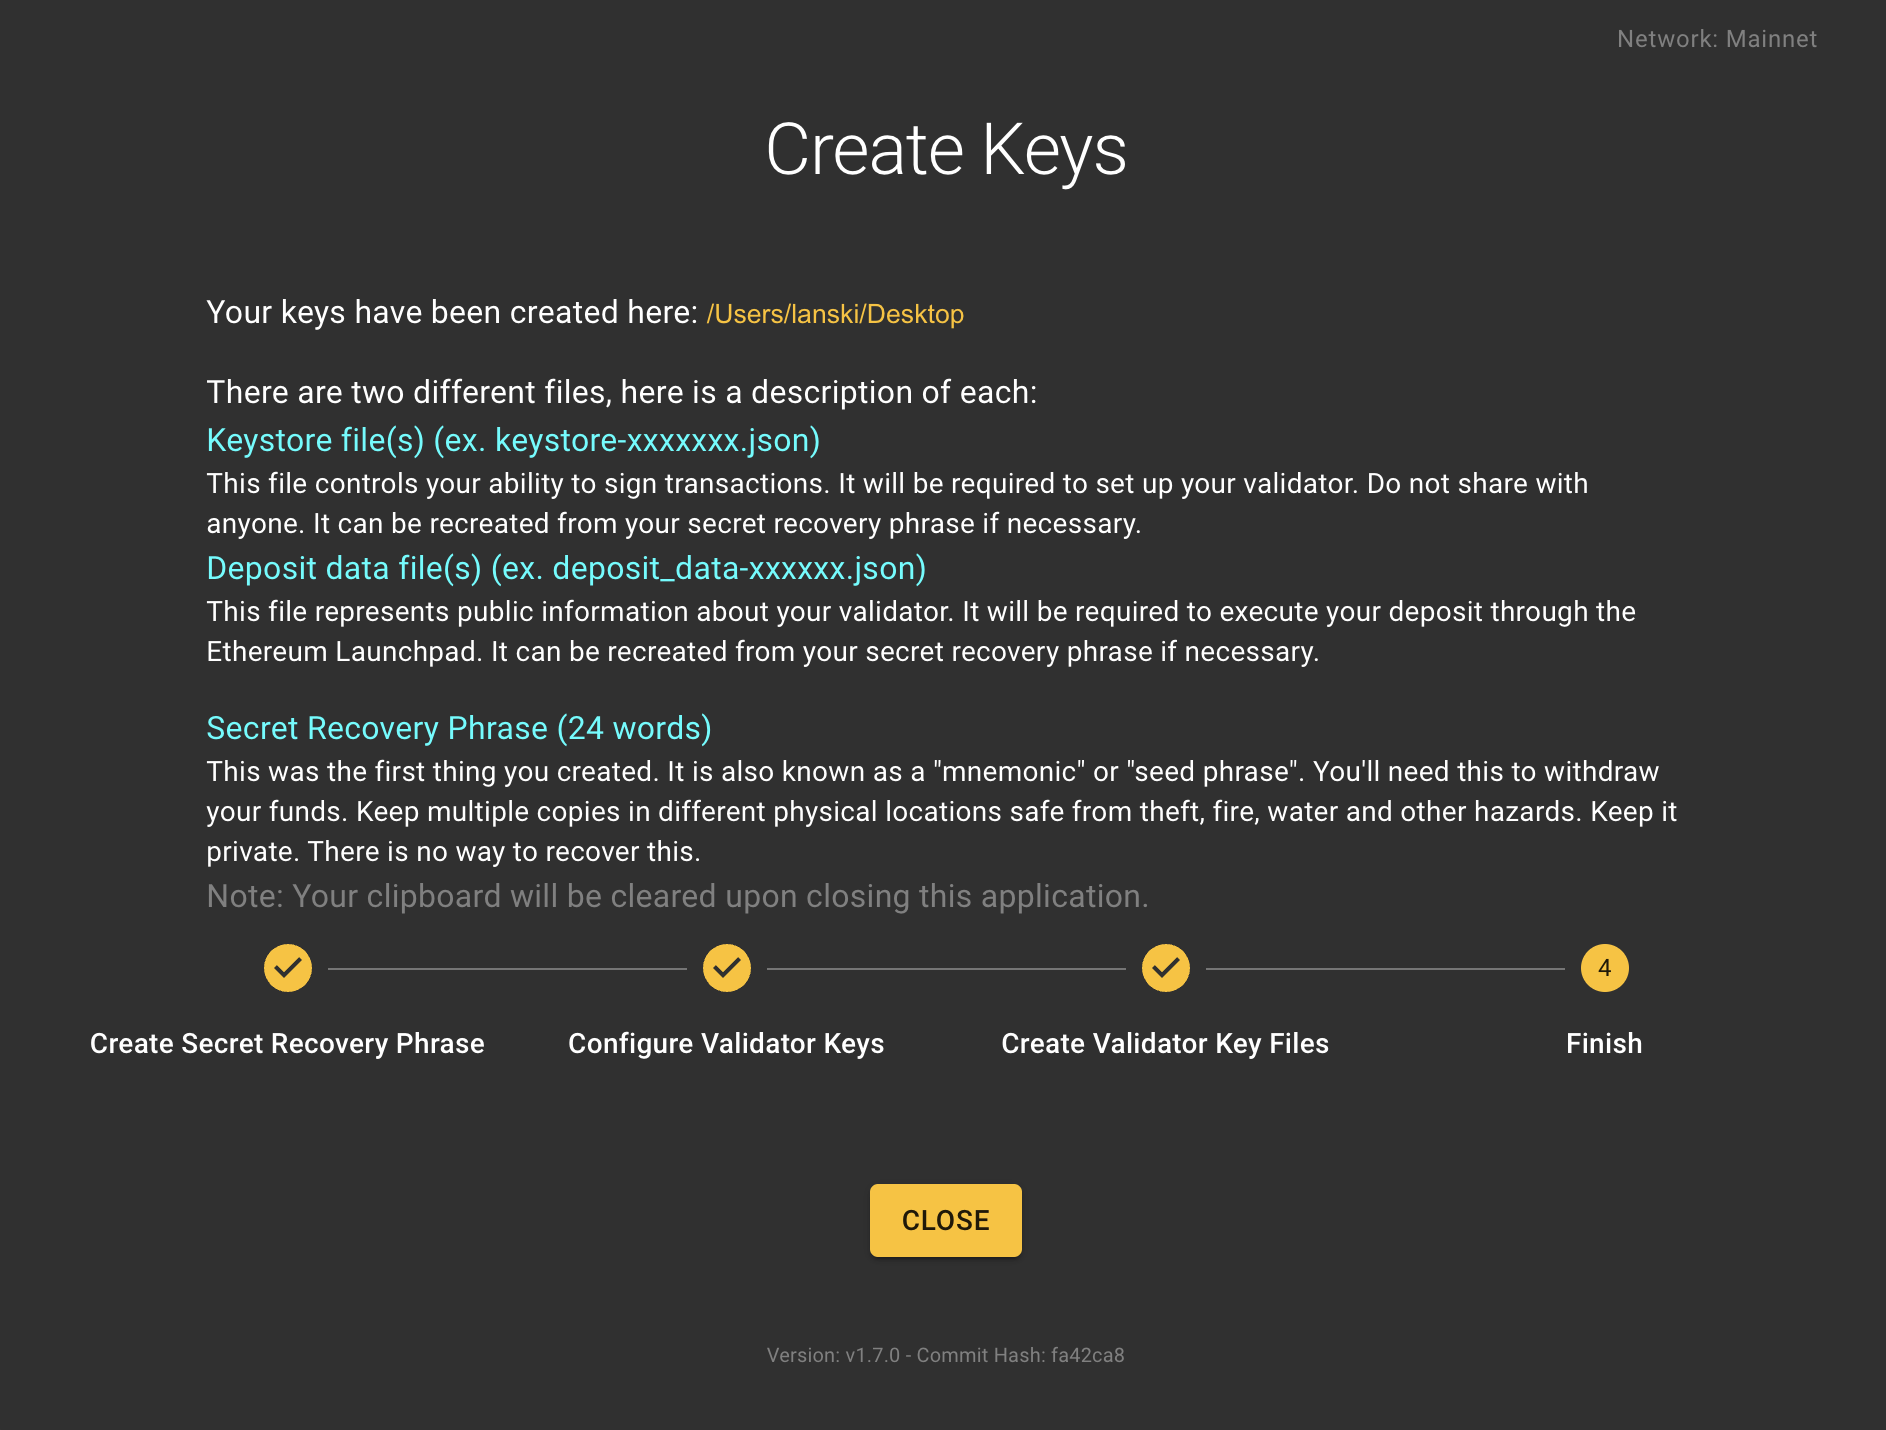
You are now done with the key generation process, and your generated keys and deposit data are in the folder/directory chosen, and displayed at the top of the final page.
💡 *Want to learn more about Ethereum keys and key generation?*💡Learn more
Now that you’ve generated your deposit data and keystores, go ahead and upload your keystores to the Web3signer that you installed during step 1.
Return to the Dappnode UI and navigate to the Stakers > Ethereum menu. Your Web3Signer will have a link saying Upload Keystores . If it doesn’t, make sure that you have waited enough time since step 1 for all the packages to be installed (around 5 minutes) and refresh the page.
Then click on the Import Keystores button on the lower part of the Web3Signer UI.
Here browse for the keystore file(s) you generated in the previous step and enter them along with the password you chose to secure your keystores.
You are now ready to fund these validator accounts and start validating!
3: Deposit ETH into the Ethereum deposit contract
The final step is to fund your validator with the 32 ETH necessary to register as a validator and start receiving validation work!
To do this, you will need to send 32 ETH to the Ethereum deposit contract. We will be using the official Ethereum launchpad for this.
Navigate to the launchpad
Read all the advisories... they contain important information that will help you understand the whole process!
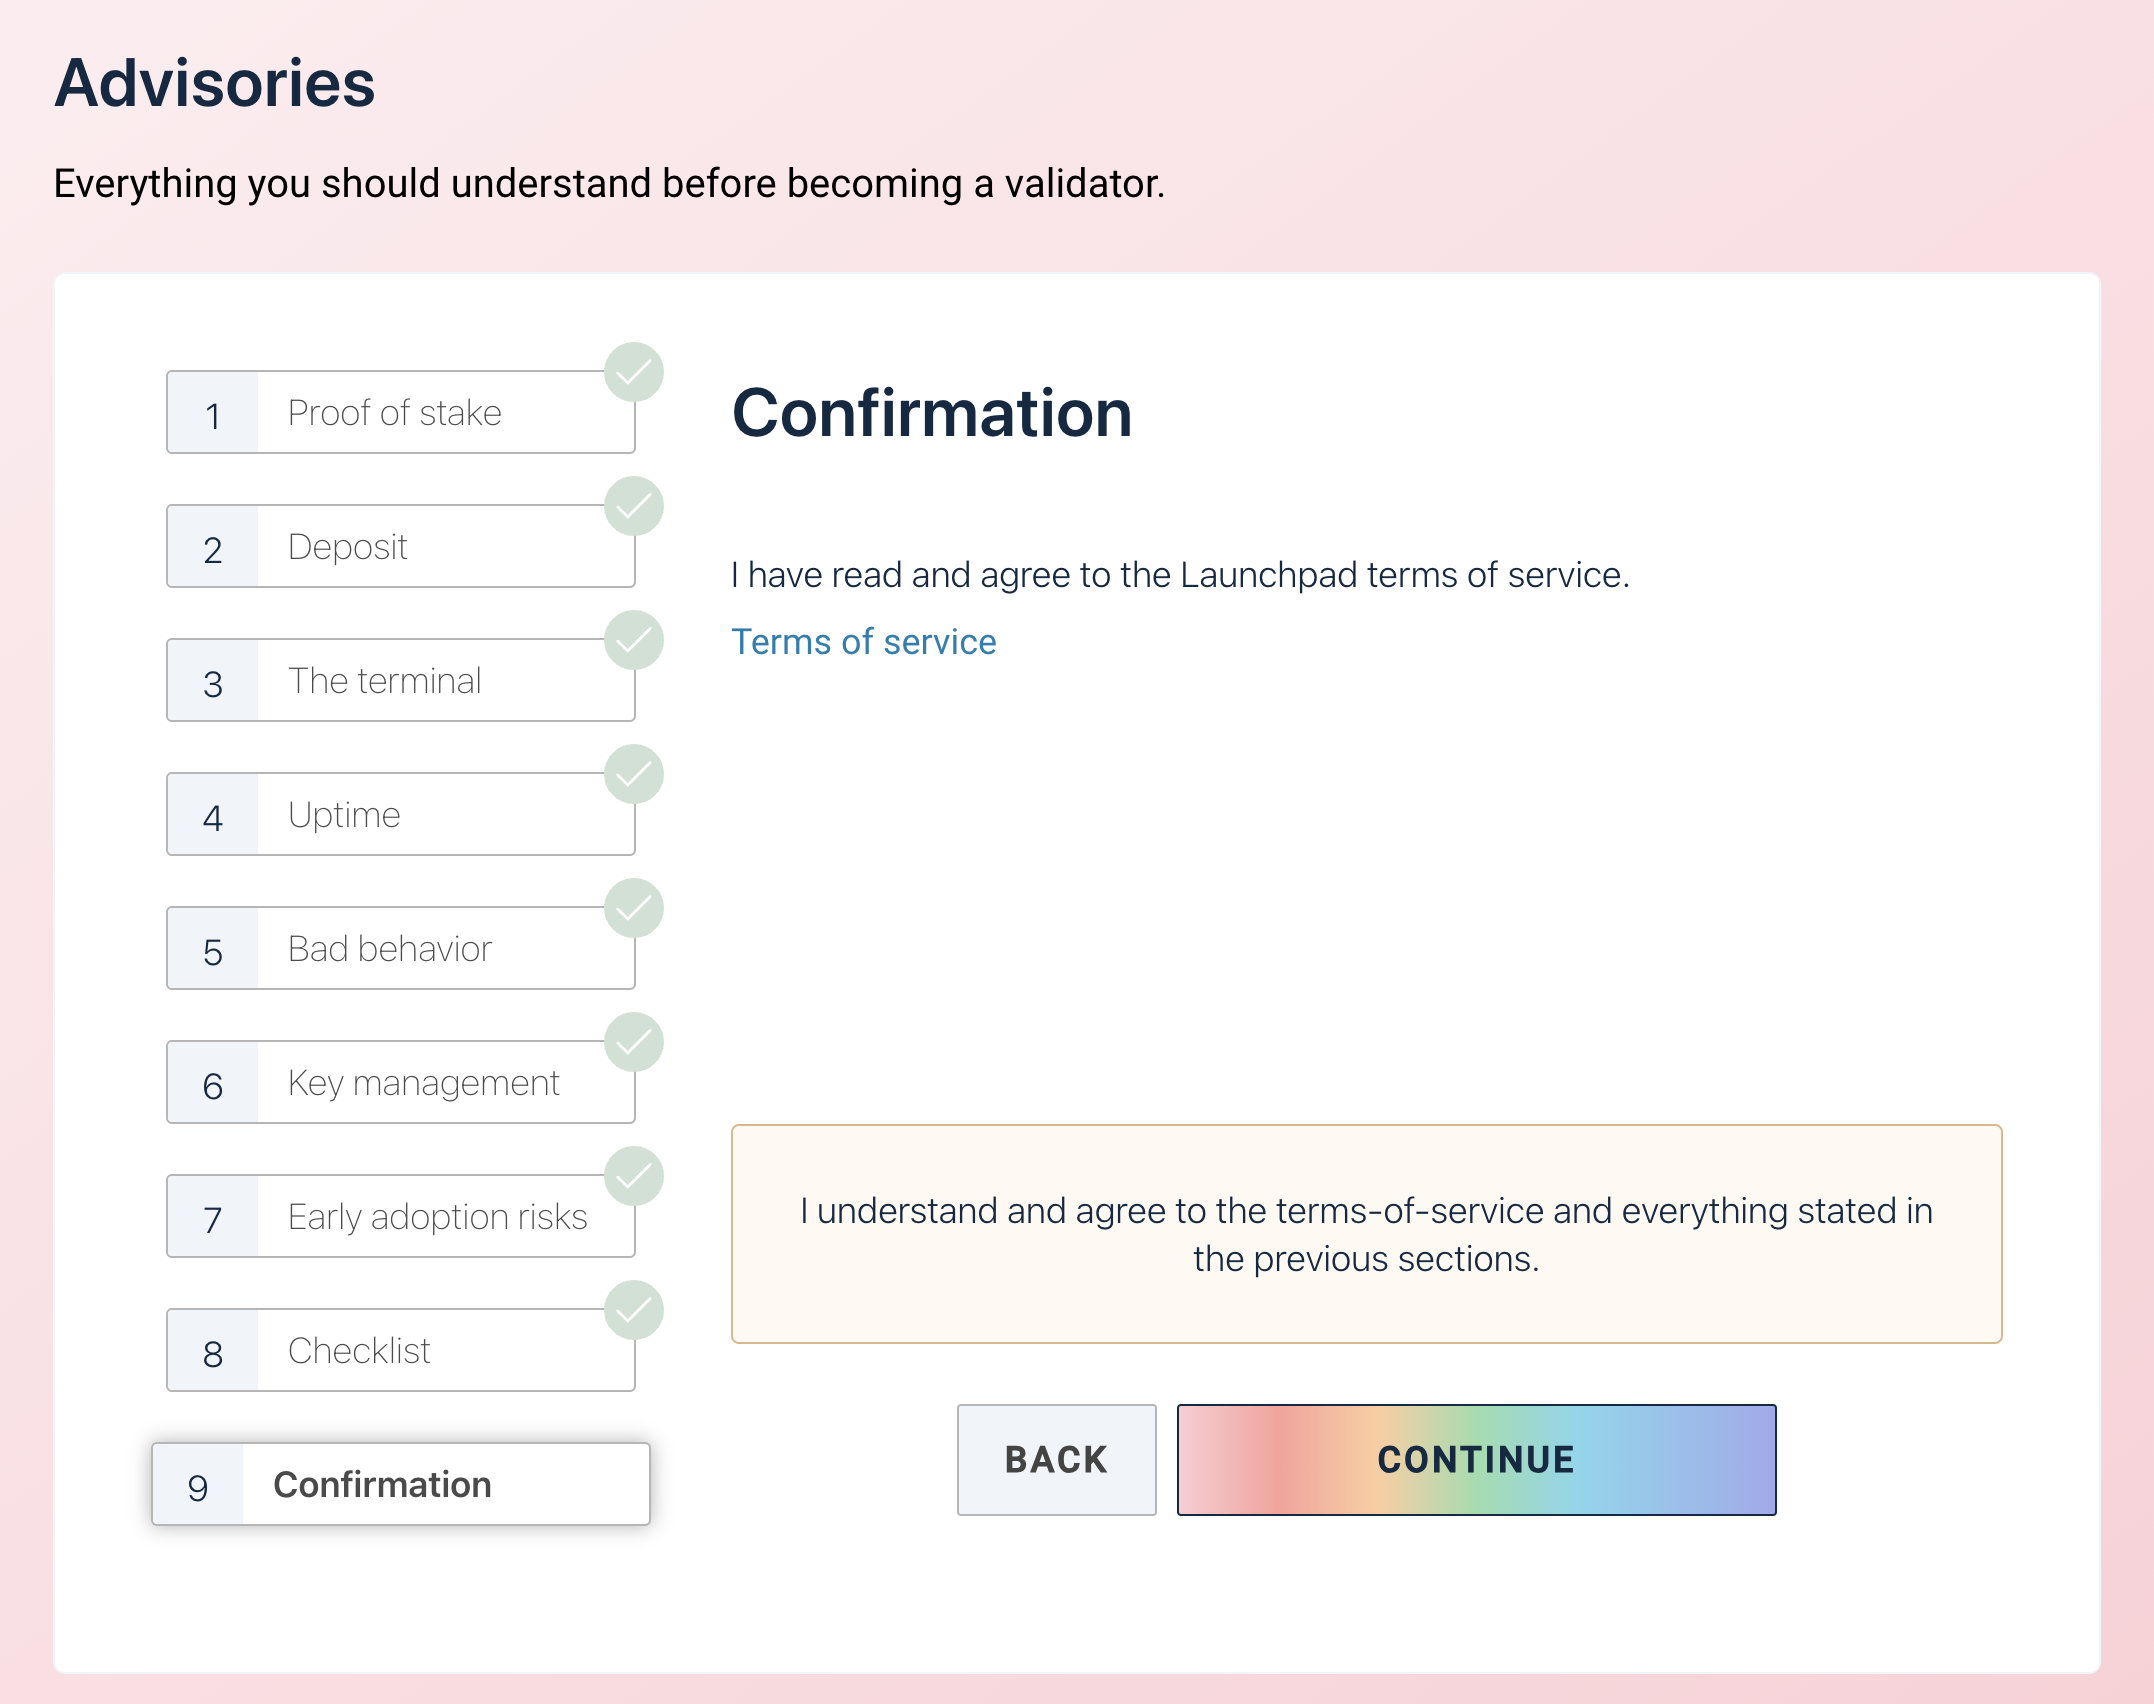
Because we are using Dappnode and we take care of the infrastructure and the software installation, we can skip the next sections:
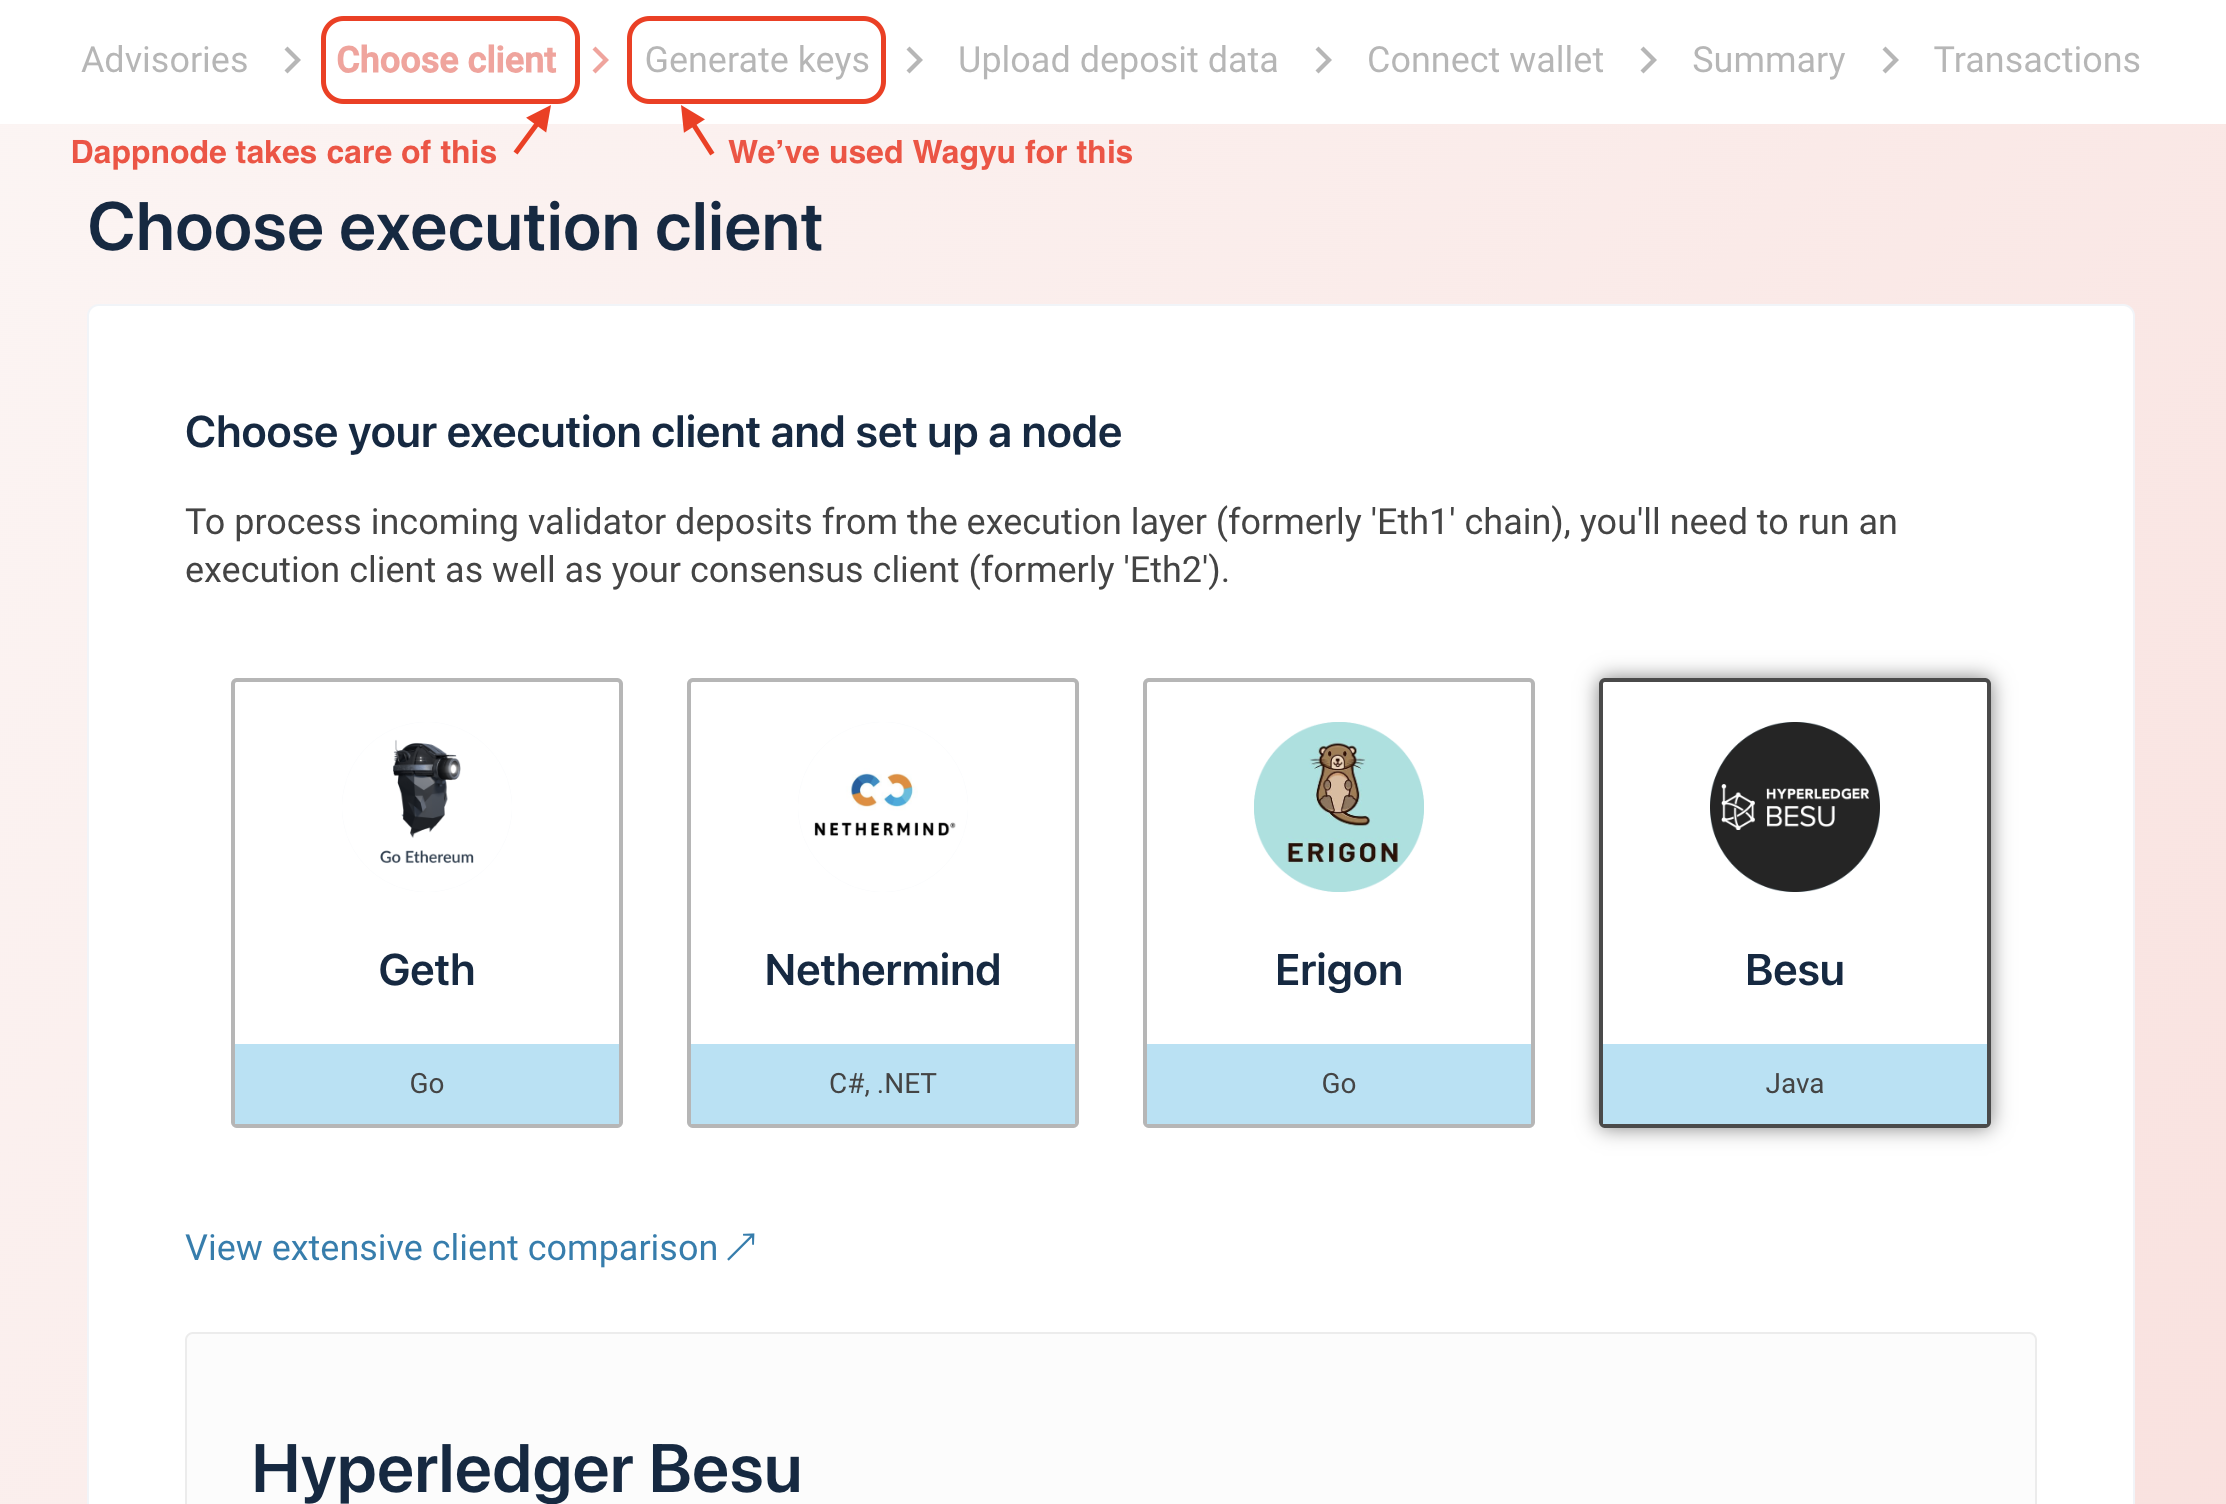
We continue until the "Upload Deposit Data" section.
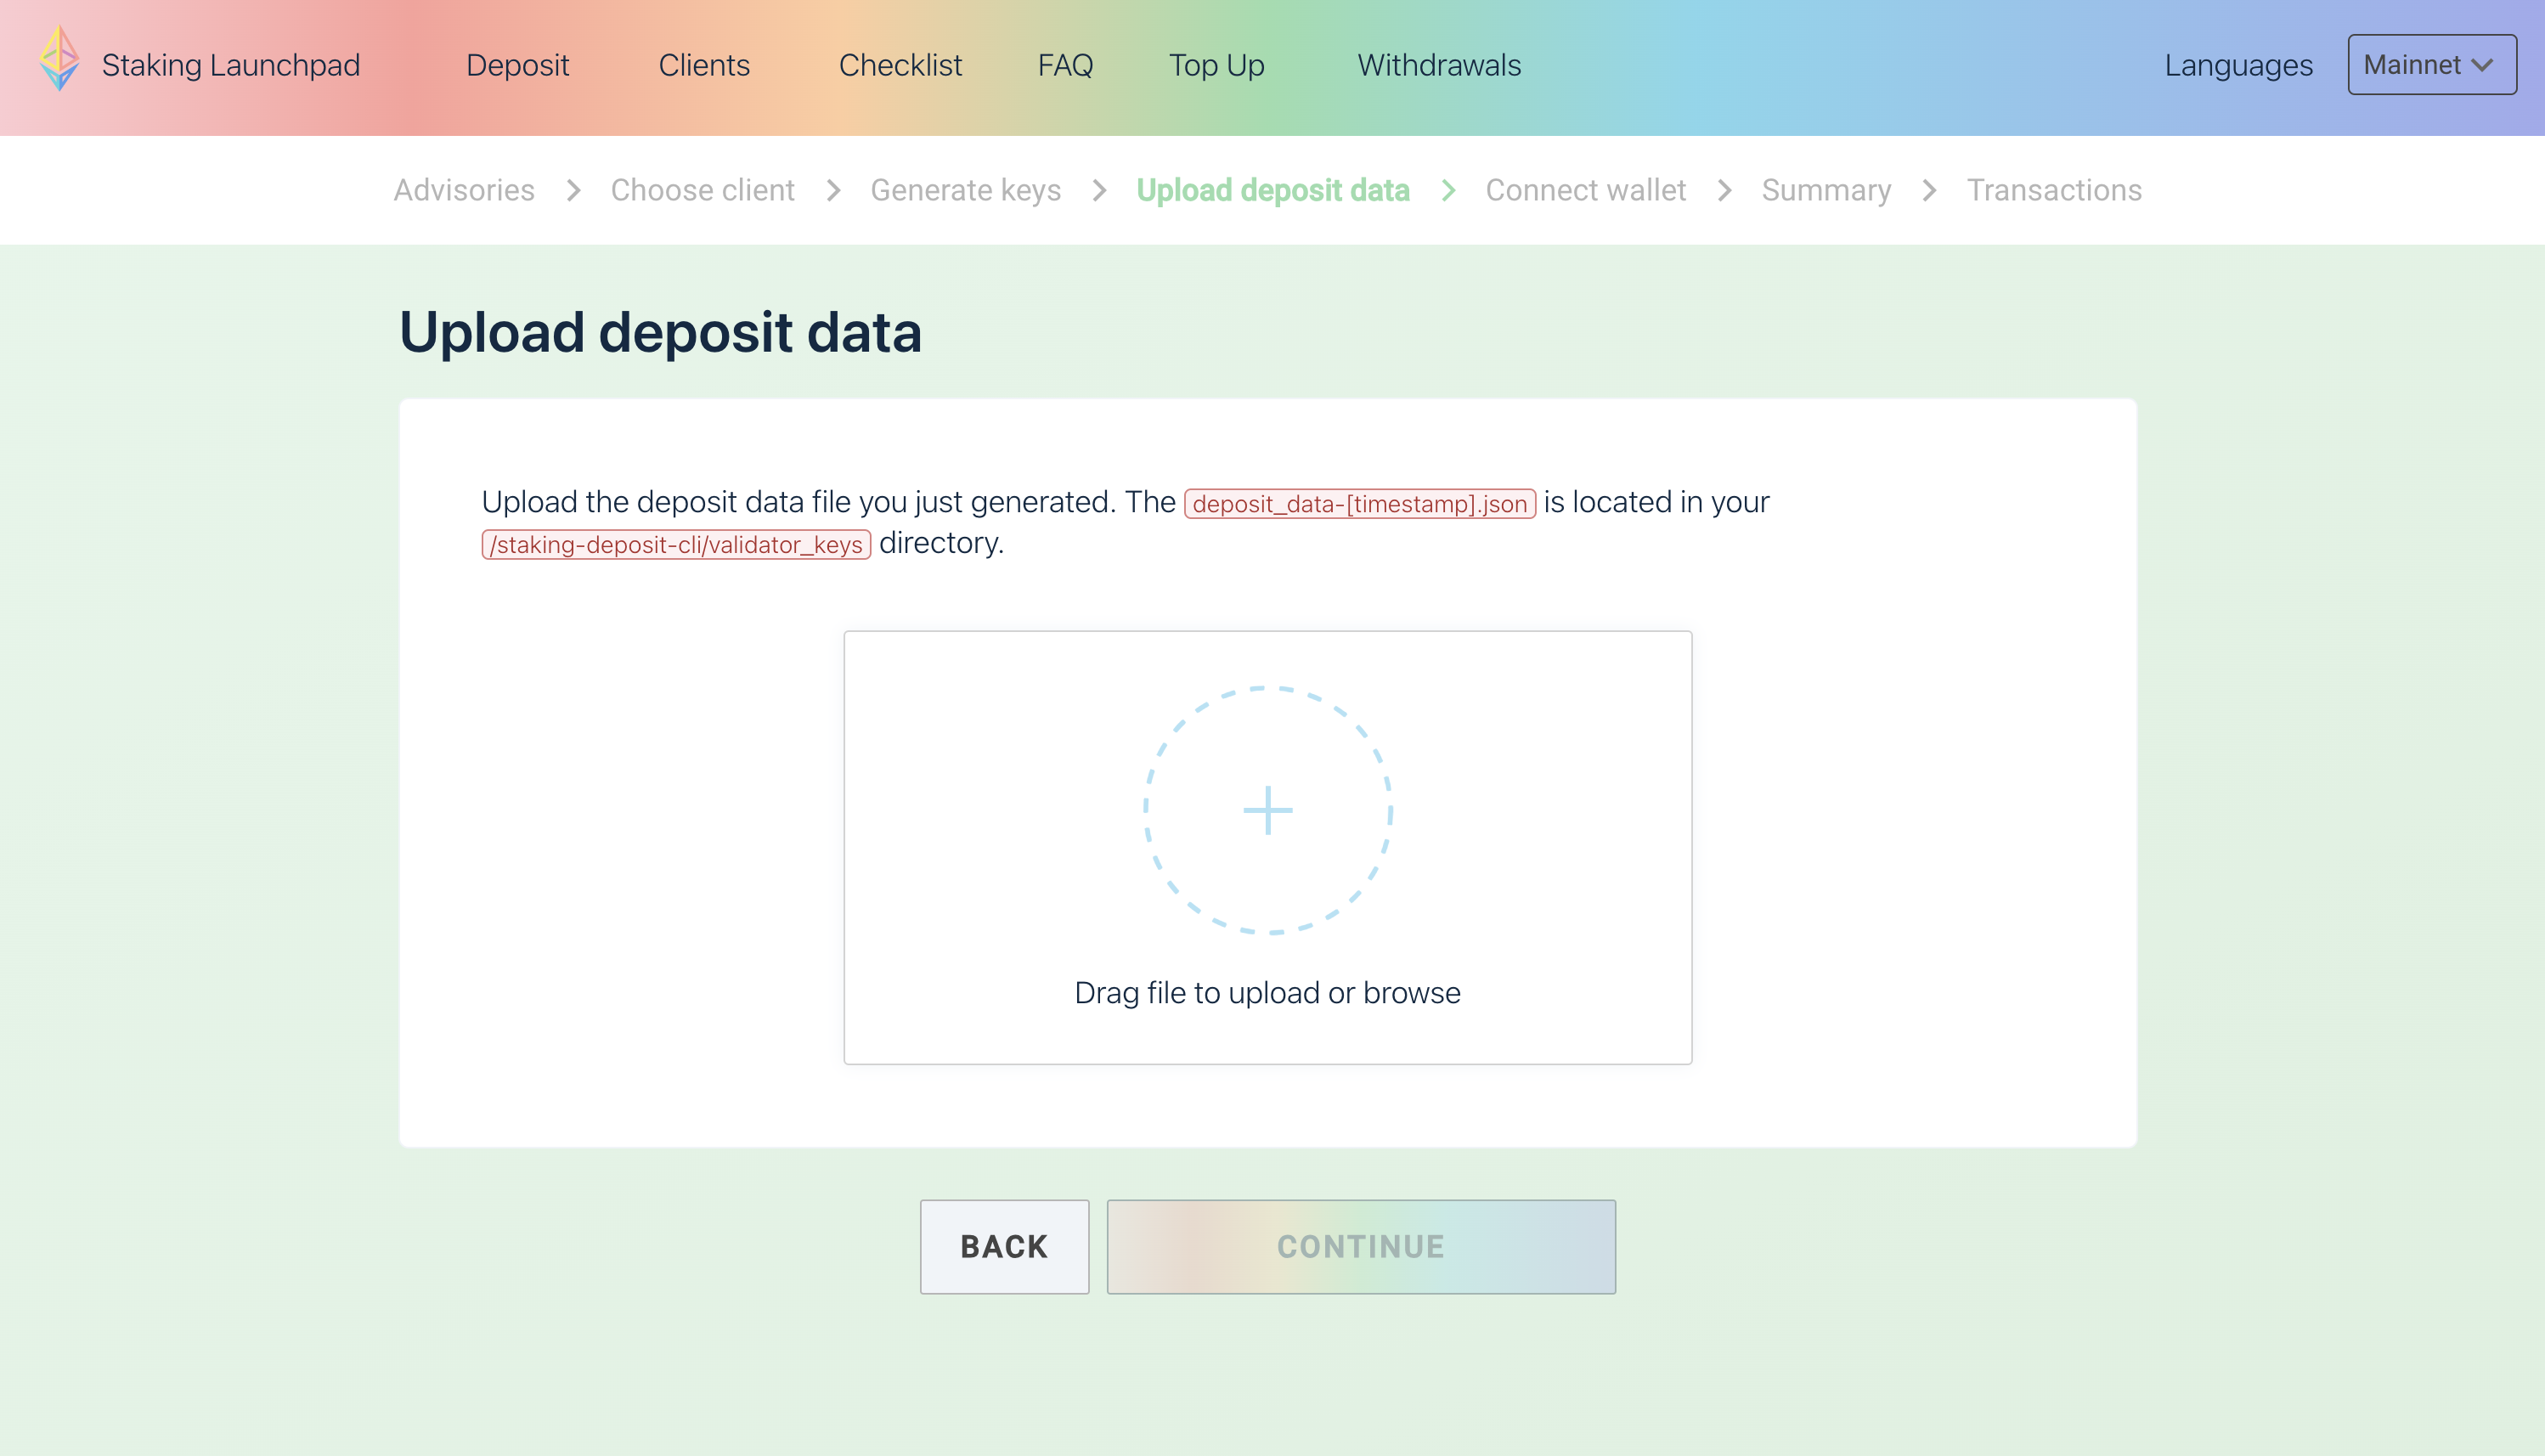
Here we will upload the deposit data that we generated in the previous step. You can find it in the folder you chose when generating the keys. It will be a file called deposit_data-*.json
The moment to do the deposit is here! Connect your wallet (yes, the one that has the 32 ETH!).
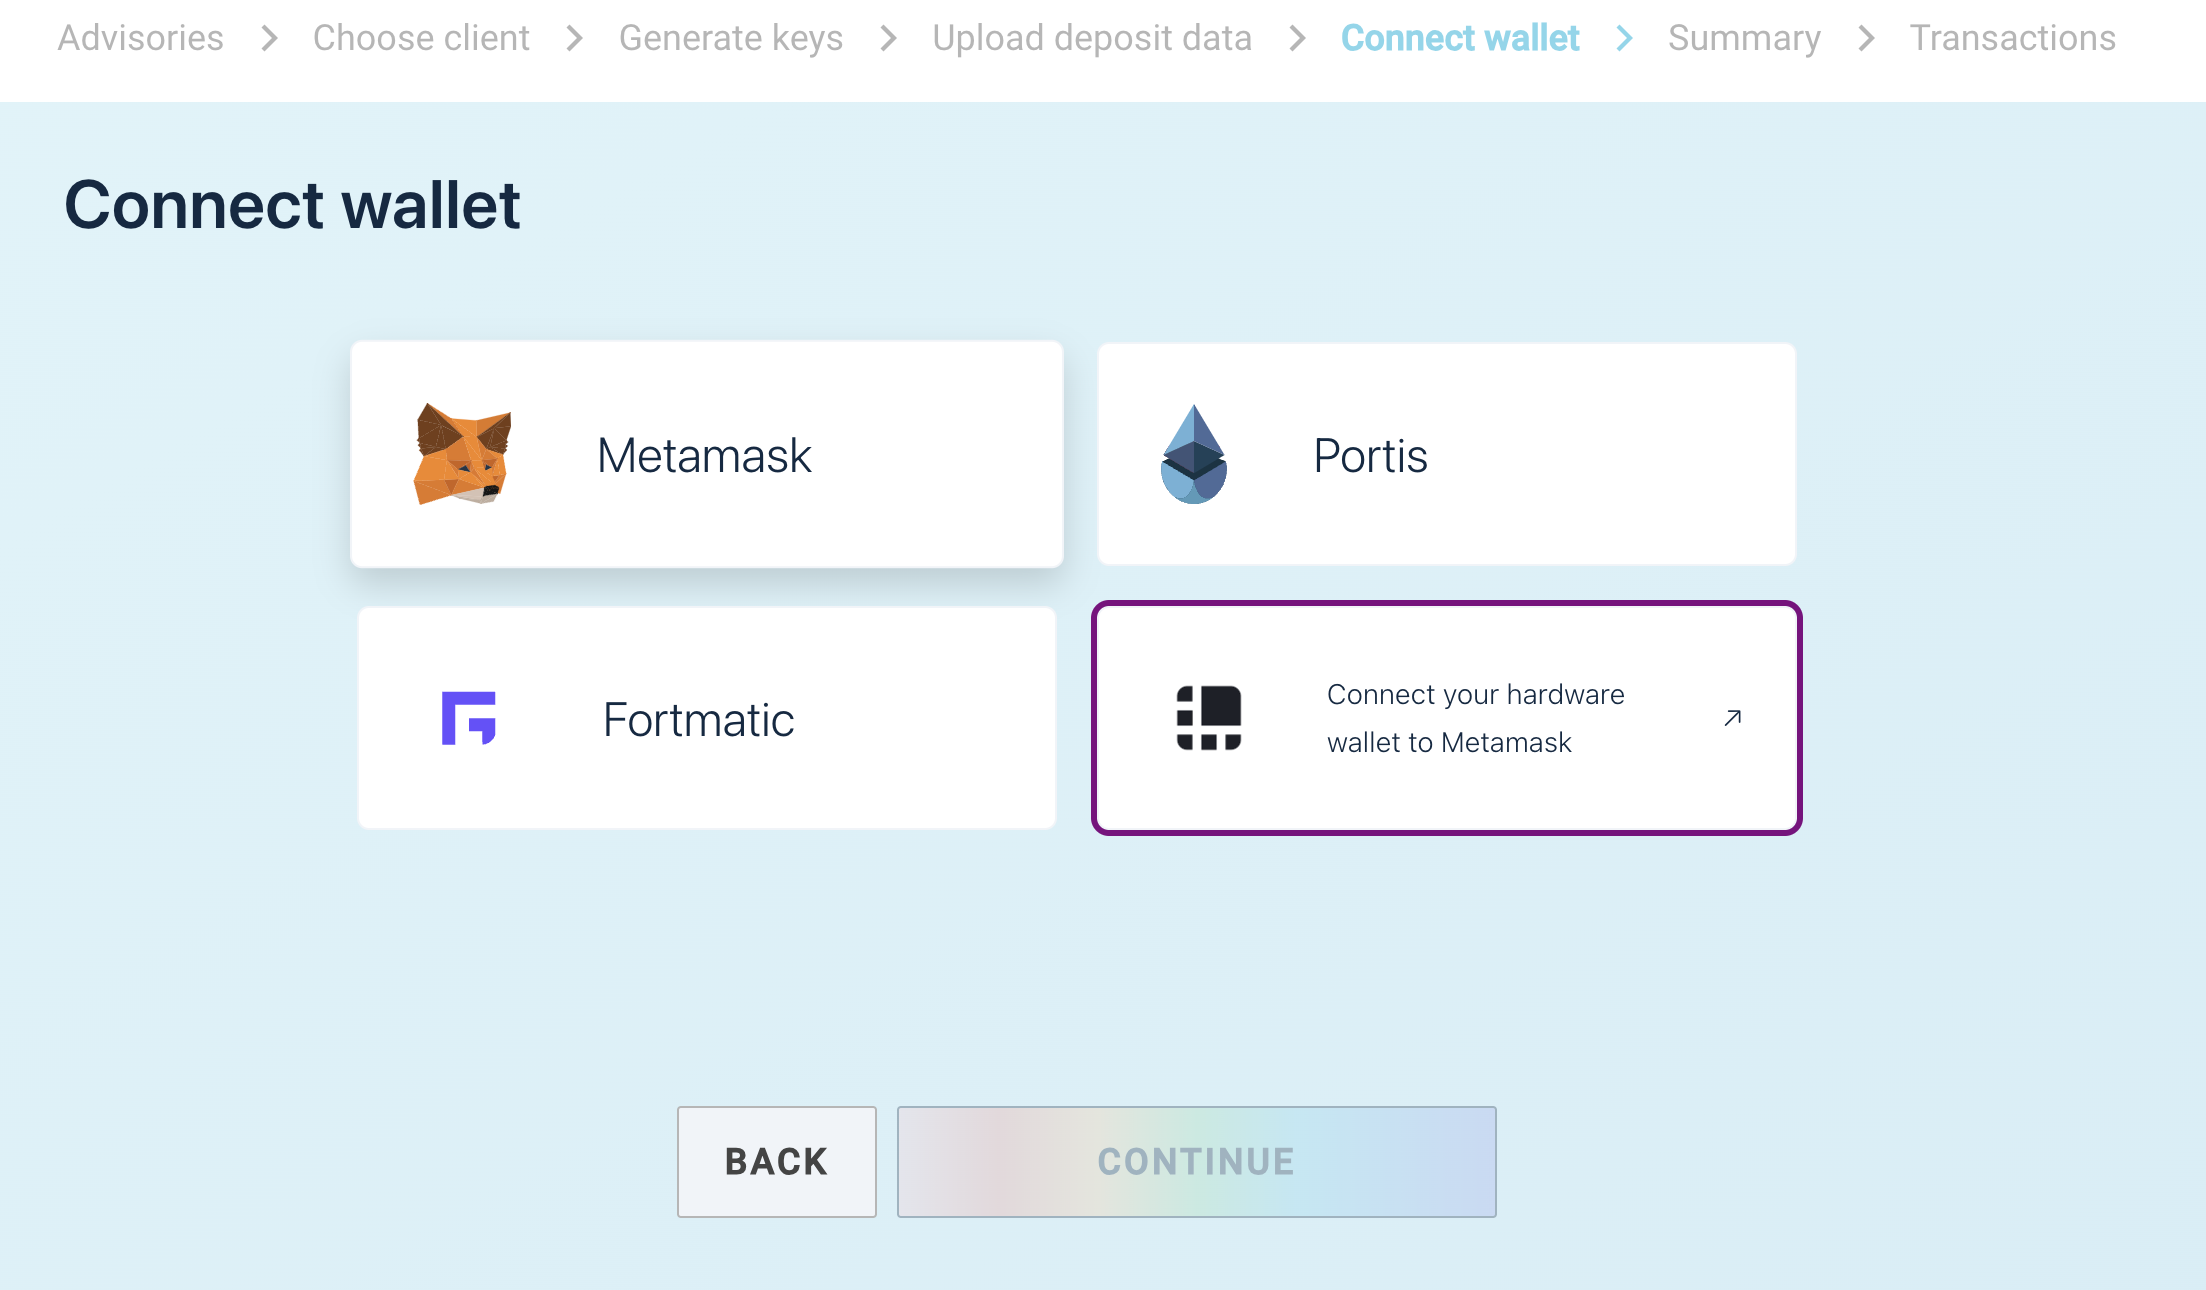
And follow the steps to send the 32 ETH to the deposit contract!

You will be prompted to review the deposit address in the next step. PLEASE DO SO! MAKE SURE YOU ARE SENDING THE 32 ETH TO THE RIGHT DEPOSIT ADDRESS!
After the deposit is gone, you will be able to check the progress of your deposit by searching for your validator key in the beaconcha.in explorer. You can get a direct link to this by clicking on the View in Beaconcha.in button in the Dappnode Web3signer UI, where you uploaded the keystores.
[PENDING SCREENSHOT]
Additional Opportunities: MEV Boost
Considering MEV Boost? It allows your validator node to propose different relays when it's its turn. However, before diving in, a thorough understanding of the relays and any local regulations is paramount.
Remember: Embarking on the staking journey requires diligence. Always keep abreast of developments and make informed decisions.
Withdrawing my ETH
Once you want to finish your staking journey, you will need to withdraw your ETH from the Beacon Chain. This process consists of exiting the validator from the Dappnode UI.
This means that once you reach the end of the Beacon Chain's exit queue, your 32 ETH will show up in your withdrawal address as a state change in the blockchain, and not as a deposit. You can find more info here.
Opening your Web3Signer UI.
Navigate to the Stakers > Ethereum menu and click on the Upload Keystores button on the Web3Signer card.
Once you are in the Web3Signer UI, select the validators you want to exit and click on the Exit Validator button on the top right part of the UI.

Follow the instructions and type "I want to exit", followed by Exit.
Now the message to exit will be broadcasted to the network.
Your validator will not exit immediately. It will be queued to exit and you can track when it's due in the Beacon Chain Explorer. Please be patient as the Beacon Chain exit queue can get long and wait times might take up to several weeks.
Voilà! Your ETH will appear on your withdrawal address!