Connect to Your Dappnode Using Tailscale
Tailscale is a secure, peer-to-peer VPN solution that simplifies connecting to your Dappnode without requiring complex port forwarding, solving issues such as UPnP not being recognized, routers behind CGNAT, or other port forwarding challenges. This guide walks you through setting up Tailscale to access your Dappnode.
Using Tailscale is an excellent alternative if you're experiencing issues with UPnP, CGNAT, or port forwarding. It's easy to set up and ensures a seamless connection to your Dappnode.
When updating or reinstalling Tailscale, a new auth key might be required if the previous one is no longed valid (expired). You can check your current auth key status in the Tailscale Admin Settings. If you encounter issues, generate a new auth key and update it in your Dappnode's Tailscale package settings.
Prerequisites
Before starting, ensure you have:
- Access to your Dappnode's Admin UI.
- A Tailscale account.
- Tailscale installed on the device you want to access your Dappnode from. Download here.
Setting Up Tailscale
1. Create an Auth Key
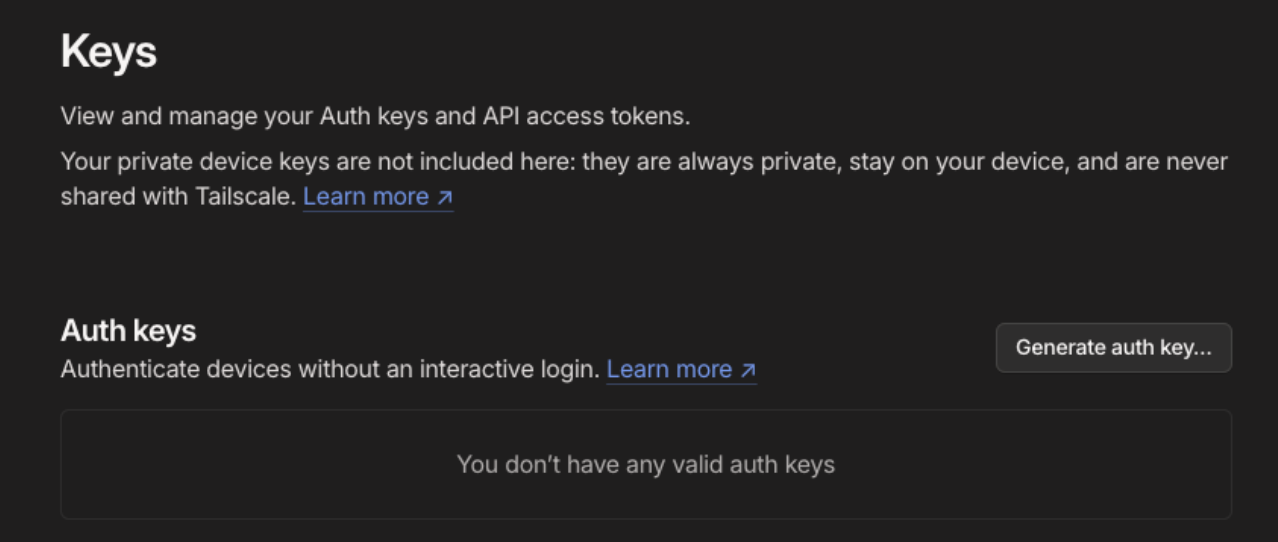
- Log in to Tailscale and navigate to Tailscale Admin Settings. Click on Generate auth key.
- Create a new auth key. Any name will work. We recommend activating the "Reusable" option so you can use the same key multiple times.
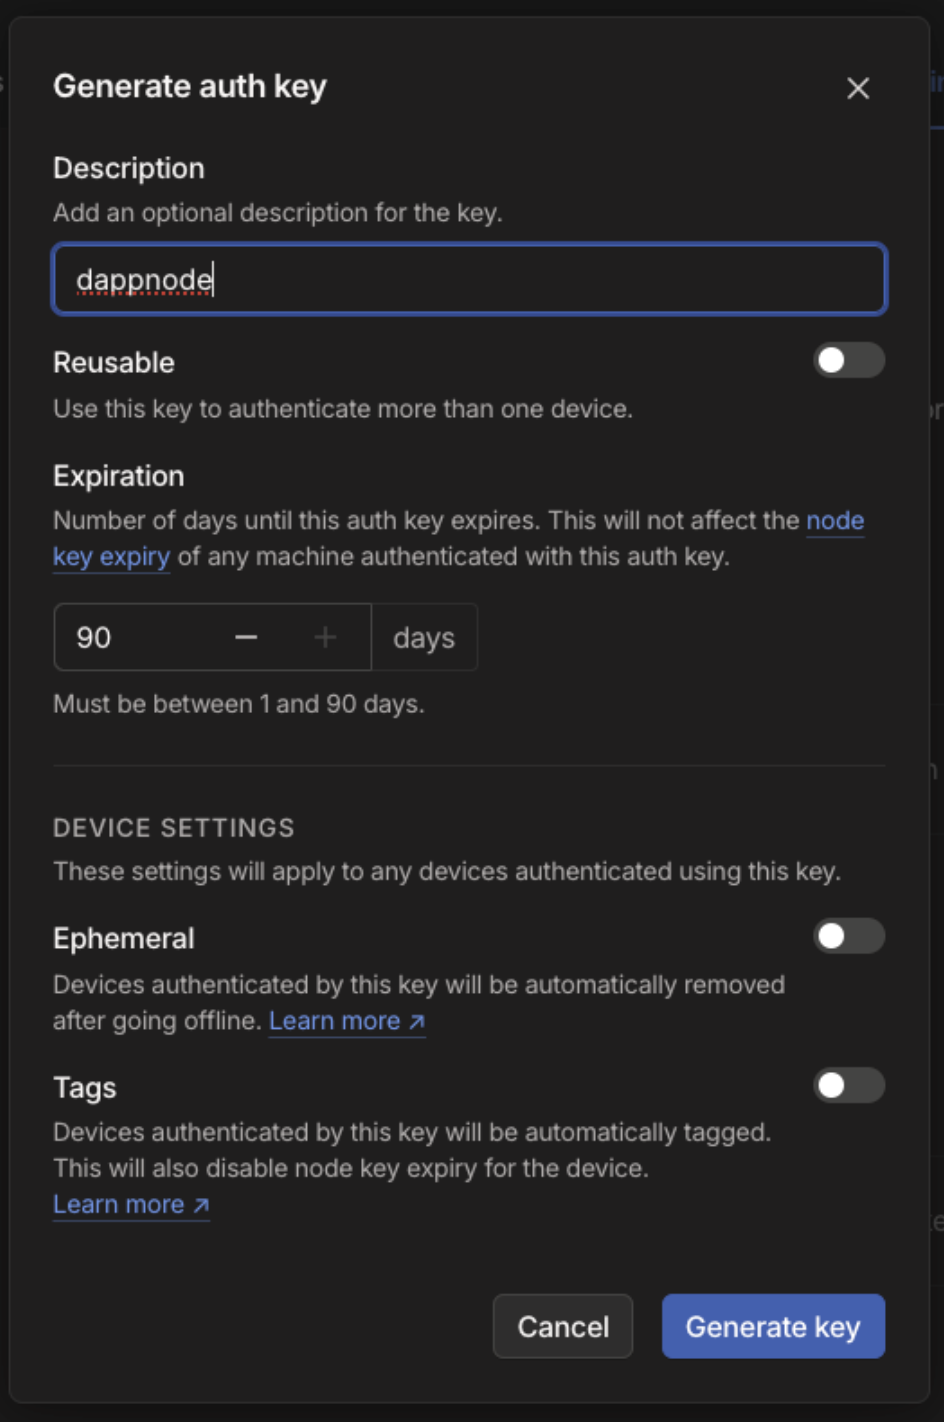
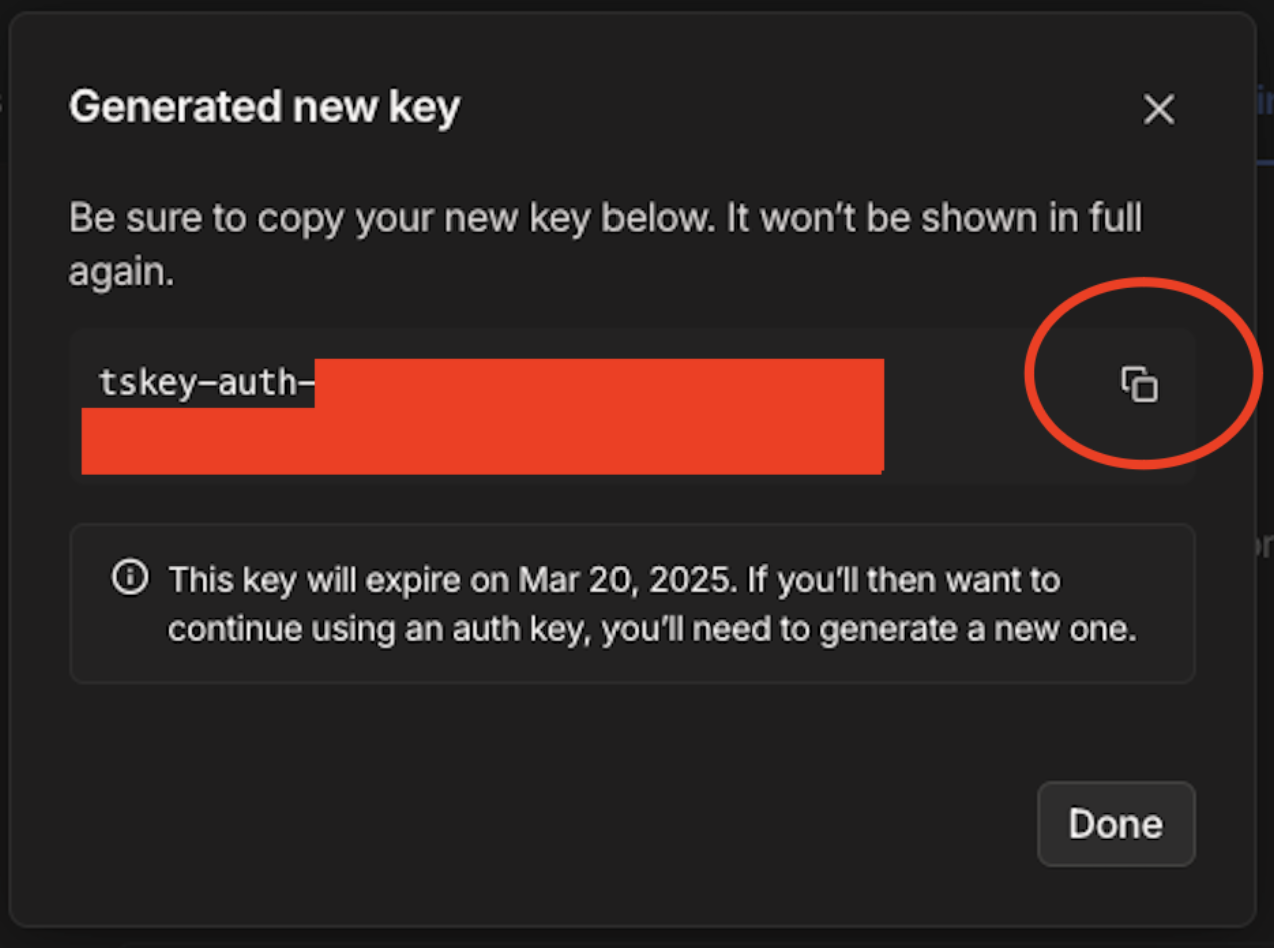
- Save the key for the next step. Do not share this key with anyone.
2. Install Tailscale on Your Dappnode
- Access your Dappnode's Admin UI
- Navigate to Dappstore and search for the
Tailscalepackage. - Click Install
- Go to the Tailscale package in Packages tab and enter the auth key you created during installation.

Once installed, Tailscale will run as as any other package on your Dappnode. In order to connect to your Dappnode with Tailscale, this package will need to be running.
3. Configure Tailscale to Connect to Dappnode Internal Networks
To ensure you can access your Dappnode's internal networks and services, you need to configure Tailscale to accept routes and set up custom DNS servers. There are two main steps to complete this configuration. Accepting advertised routes and adding custom nameservers (DNS).
a. Accept Advertised Routes from Your Dappnode
Dappnode advertises its internal networks through Tailscale, allowing you to access services like the Dappnode Admin UI and other packages. To ensure these routes are accepted:
- Go to your Tailscale Machines Dashboard.
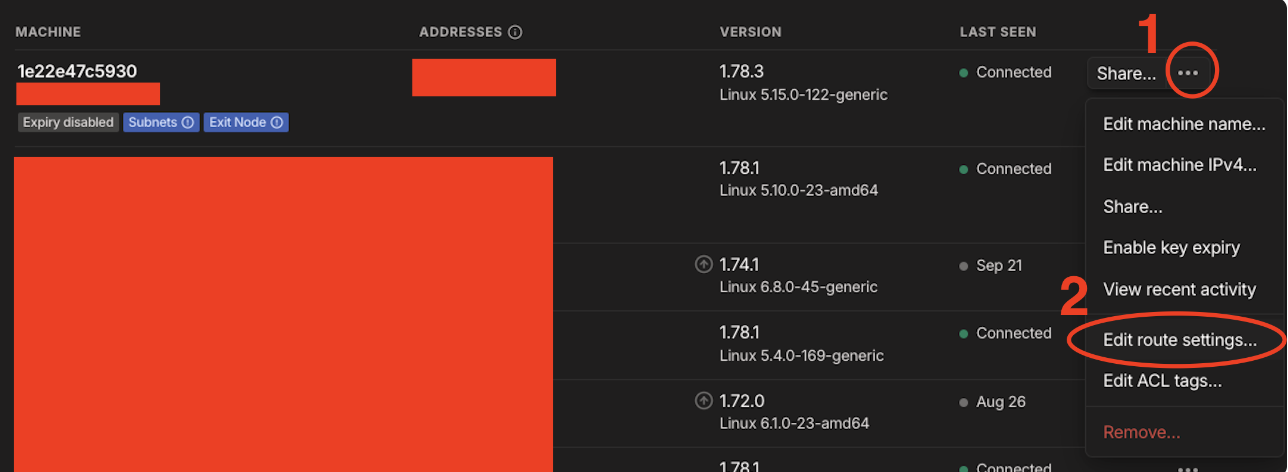
- Find your Dappnode device in the list of machines
- Open the "Edit Route Settings" modal and check the Subnet Route that appears.

b. Add Dappnode Custom Nameservers
- Go to your Tailscale DNS Admin Panel.
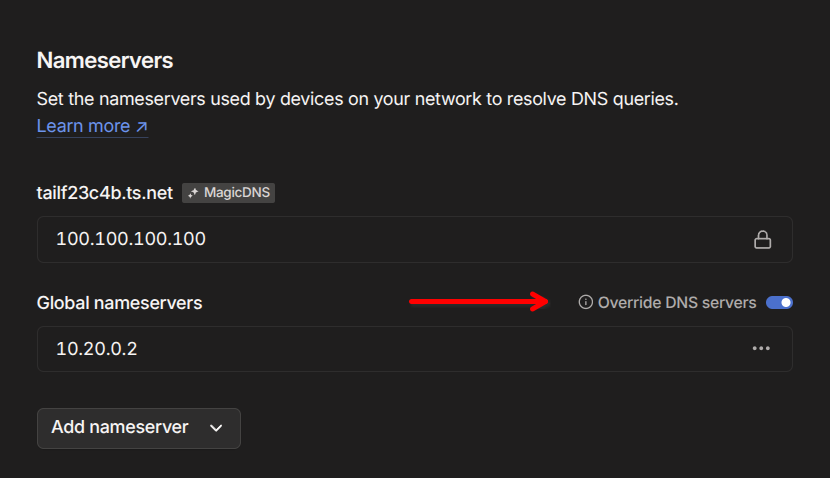
- Find the Nameservers section, click on "Add nameserver" and add a custom nameserver.

-
Fill the popup with:
- Nameserver IP:
10.20.0.2
- Nameserver IP:
-
Click and activate the "Override DNS servers" switch.
The end result should look like this, with two nameservers active:
That's it! You've successfully configured Tailscale to connect to your Dappnode. All that's left is to install Tailscale on the device you want to access your Dappnode from.
If you were already connected to your Dappnode with Tailscale, you may need to disconnect and reconnect to apply the new DNS settings.
Advanced DNS configuration
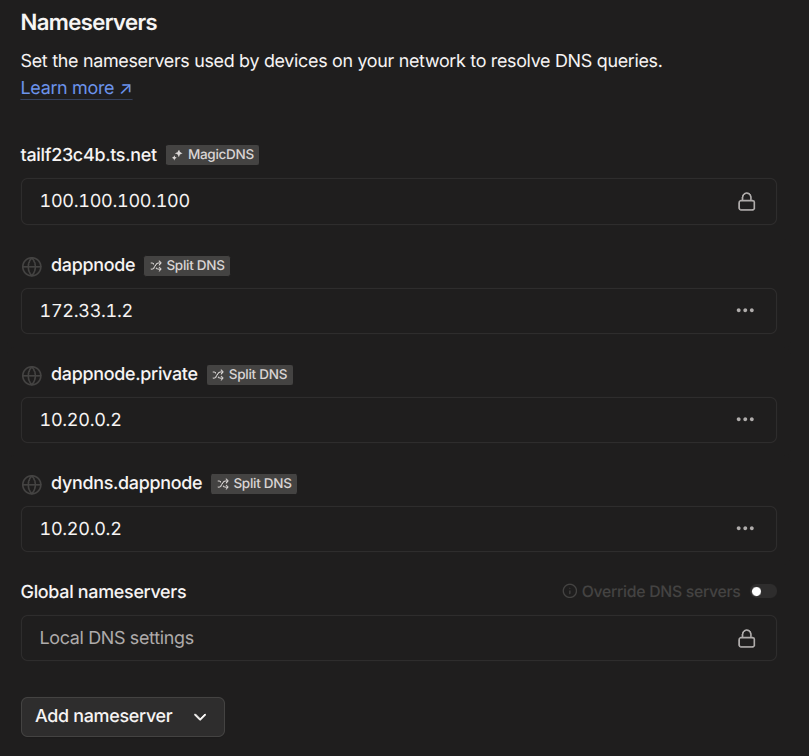
If you don't want to use the default Dappnode DNS server for everything, you can set up Dappnode's DNS server to only resolve Dappnode services. For this, you will need to add a custom DNS server for each dappnode service, restricted to a specific domain.
The following screenshot shows a configuration that only uses Dappnode's DNS server for services under the dappnode, dappnode.private and dyndns.dappnode domains, while using the default Tailscale DNS server for everything else.
4. Connecting to Dappnode with Tailscale
macOS
- Open tailscale app in your finder
- Go to the top bar and click the tailscale logo (9 dots)
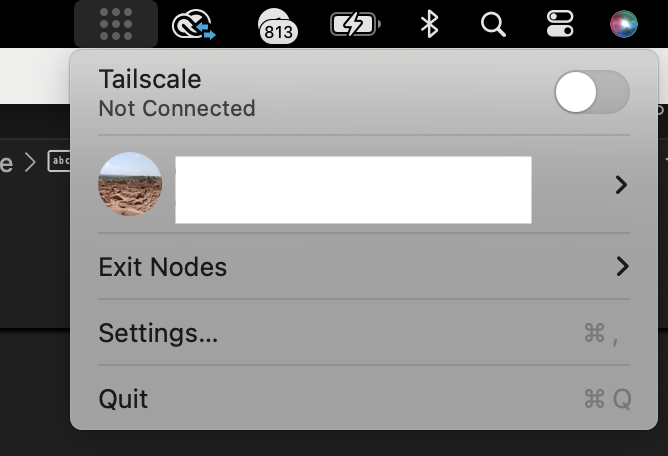
- Activate the switch to connect.
Linux
- Open up a terminal and run the following command:
sudo tailscale up --accept-routes
-
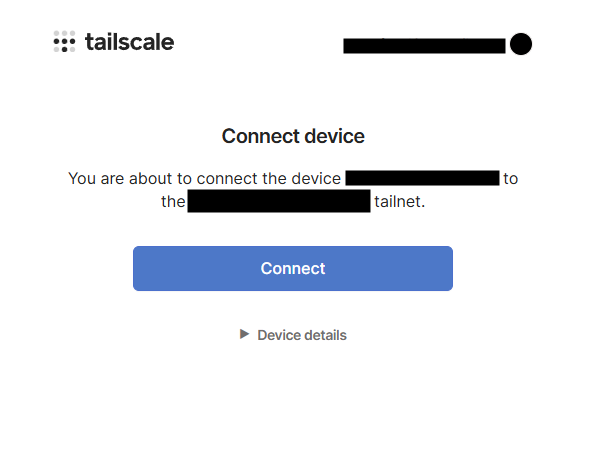
If it's your first time using Tailscale in this device, a browser window may open asking to connect this device to your Tailscale account. Click on "Connect". That's it! You're now connected to your Dappnode.
-
To stop Tailscale in any moment, run the following command:
sudo tailscale down
Having trouble using Tailscale on Linux? Check out the Tailscale Linux documentation for more information.
Windows
- Once installed, Tailscale's icon will appear in your system tray. Click on it.
- If it's your first time using Tailscale in this device, a browser window may open asking to connect this device to your Tailscale account. Click on "Connect". That's it! You're now connected to your Dappnode.
- To disconnect tailscale, right click on the icon on the system tray and log out or exit the application.
Having trouble using Tailscale on Windows? Check out the Tailscale Windows documentation for more information.
iOS
- Download Tailscale from the App Store.
- Open your Tailscale app and Log in
- Connect to your dappnode by clicking on the "Connect" button.
Having trouble installing Tailscale on iOS? Check out the Tailscale iOS documentation for more information.
Android
- Download Tailscale from the Google Play Store.
- Open your Tailscale app and Log in
- Connect to your dappnode by clicking on the "Connect" button.
Having trouble installing Tailscale on Android? Check out the Tailscale Android documentation for more information.
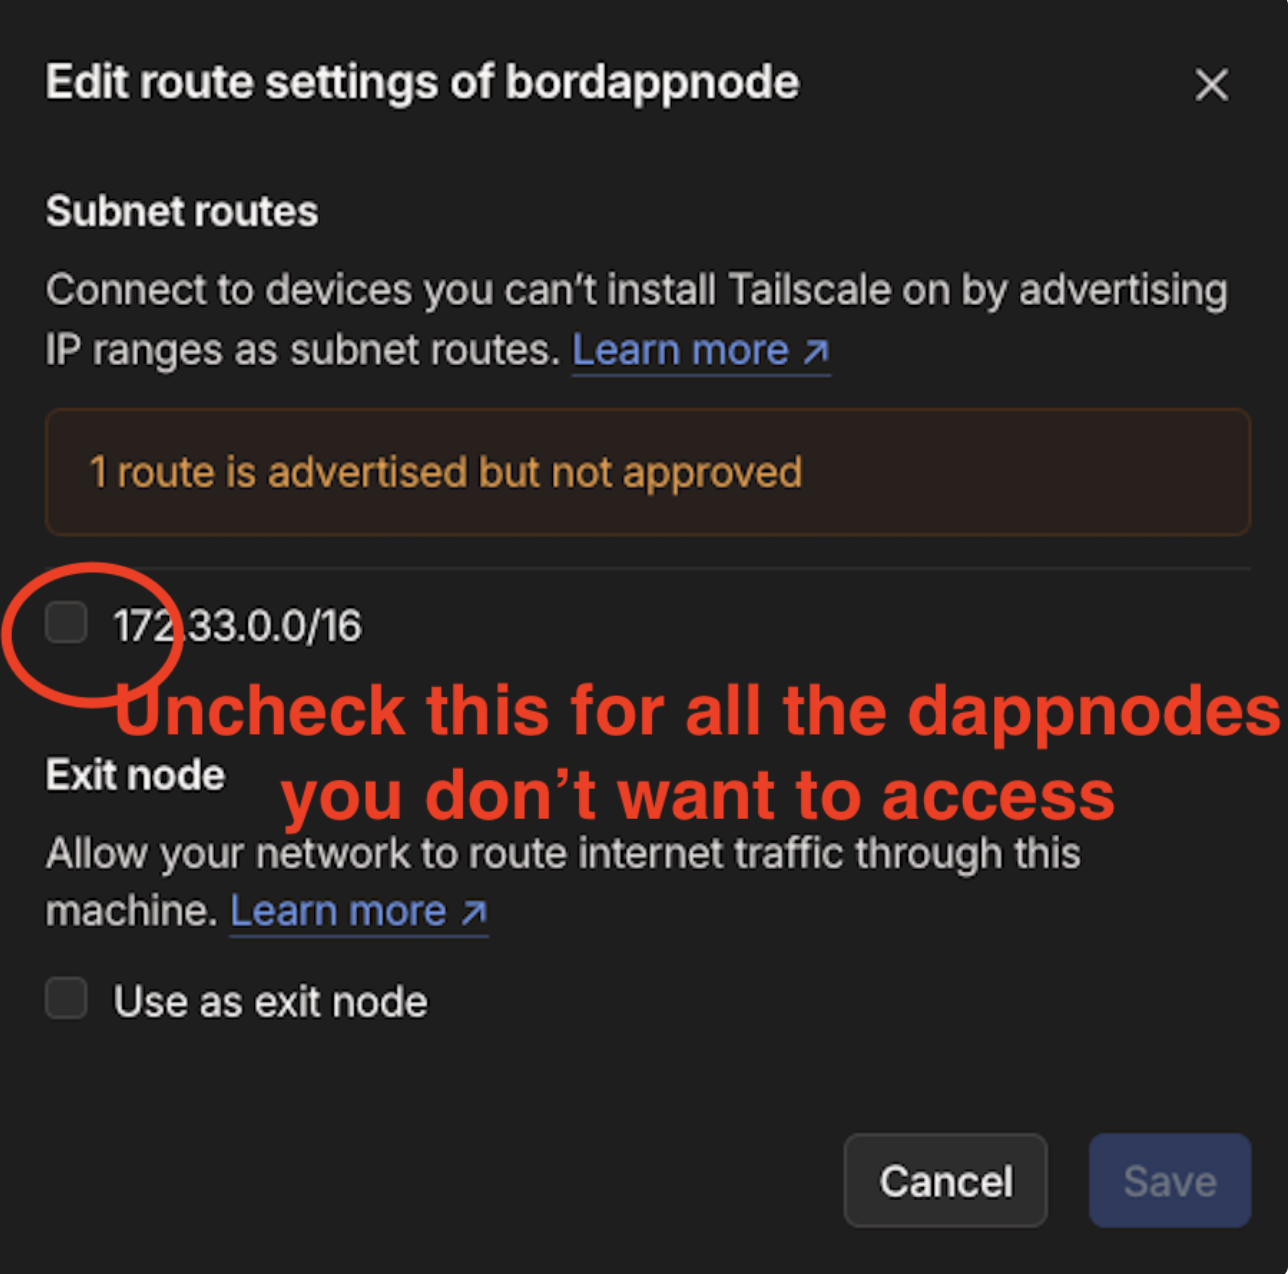
5. Do you have two Dappnodes?
It won't work automatically and you won't be able to choose which one connects.
You have to go to the machines that you don't want to access and disable subnet routes. Your tailscale will direct you to the one that does have the subnets activated.
If you encounter any issues or need further assistance, refer to Dappnode's Discord, the Dappnode Community Forums, or Tailscale Support.