WireGuard Access to Dappnode
WireGuard is a modern, high-performance VPN protocol that offers a simple and streamlined approach for securely accessing your Dappnode. This guide will walk you through setting up WireGuard with your Dappnode.
You will need:
- Your dappnode
- A Wireguard client installed on your usual device (laptop, mobile, etc.)
Setting Up WireGuard
1. Get VPN Credentials
There are two primary methods to obtain your VPN credentials:
Option 1: Via Dappmanager UI
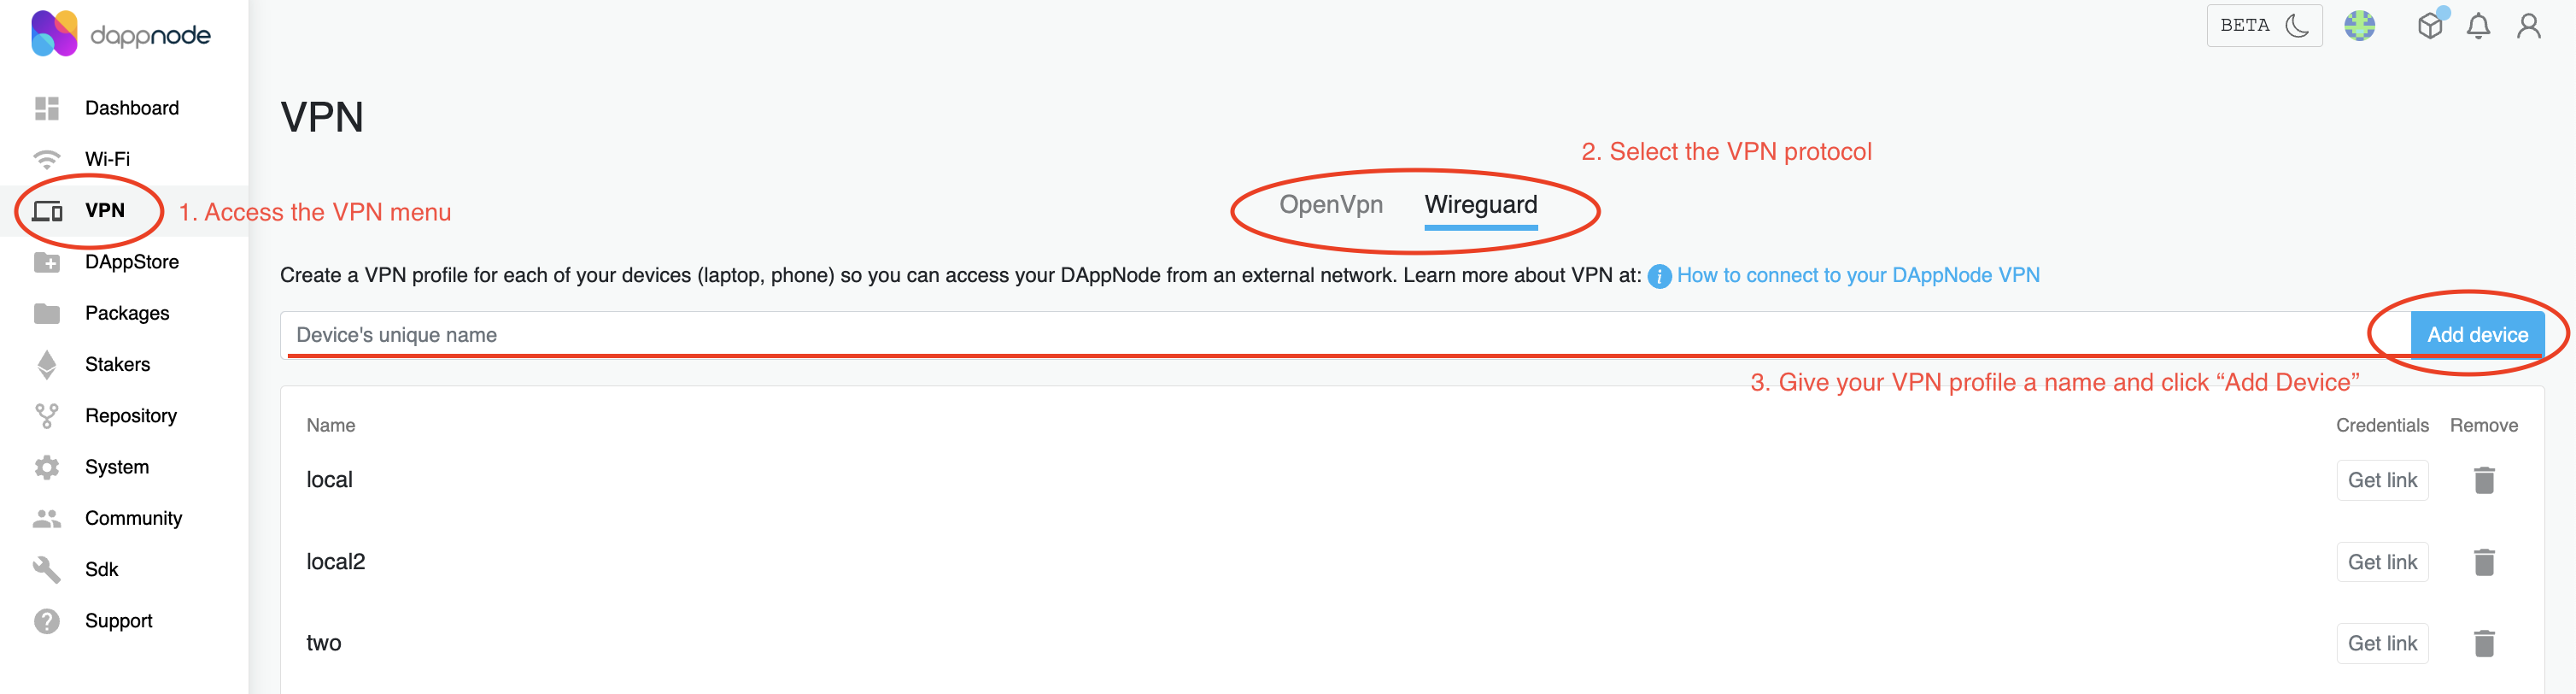
If you have access to the Dappmanager:
-
Navigate to VPN > WireGuard.
-
If you don't see any device added to the list:
- Provide a name for your device.
- Click on 'Add New Device'.
-
To retrieve the credentials:
- Click on the 'Get link' button on the credentials column.
- You will be shown 3 different ways of retrieving the credentials:
- Download config: it will download a .txt file with the credentials in plaintext
- Copy config: it will copy the credentials in your clipboard so you can paste them in your wireguard client
- Show config QR code: it will generate a QR that you can scan with a wireguard mobile client to add the config directly
- Please, see step 3. Setting up Wireguard client to see how to use this config once you have a client in your device (desktop/laptop/phone)
-
For Local Access Credentials:
- Click on 'Show Local Credentials'.
- Copy the local credentials displayed.
-
Option 2: Via Dappnode Terminal
If you can't access the Dappmanager, you'll need to get the credentials via the Dappnode terminal:
-
Access the Dappnode terminal, as explained here.
-
Execute the command:
dappnode_wireguard. -
The credentials will be displayed directly on the terminal. Copy these credentials.
- For Local Access Credentials:
- Execute the command:
dappnode_wireguard --local. - Copy the local credentials displayed.
- Execute the command:
Local credentials allow you to establish a connection to your Dappnode when you are on the same local network. They are especially useful when remote credentials might not work due to certain network restrictions or configurations.
While remote credentials enable access from outside your local network, local credentials ensure a reliable connection within your home or office network. It's recommended to use local credentials when you are in proximity to your Dappnode to guarantee a stable and swift connection.
Always remember: Local credentials only work inside your own network. If you're trying to access your Dappnode from a different location or network, you'll need to use the remote credentials.
Ensure you store these credentials securely. They provide direct access to your Dappnode. Treat them with the same level of caution as you would a password.
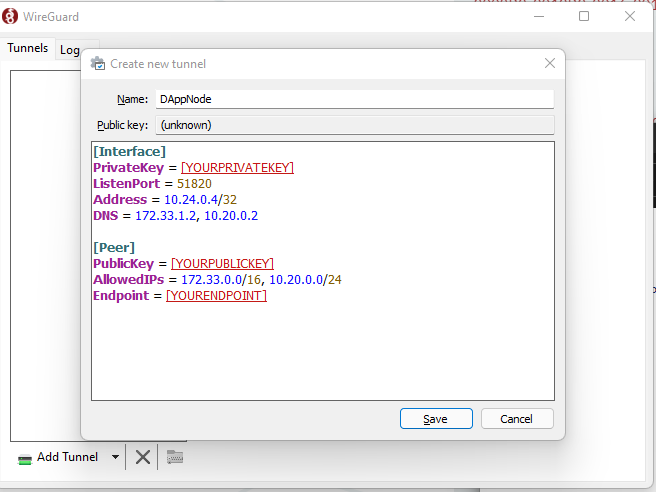
2. Installing WireGuard Client
After obtaining your VPN credentials, the next step is to install the WireGuard client. You can download the one that's compatible with the device you are going to use to connect to the Dappnode machine from the WireGuard website.
3. Setting Up WireGuard Client
After installing the client:
- Launch the WireGuard application.
- Click on 'Add Tunnel' or 'Import Tunnel from File' based on your platform.
- Import the credentials you obtained in the earlier steps.
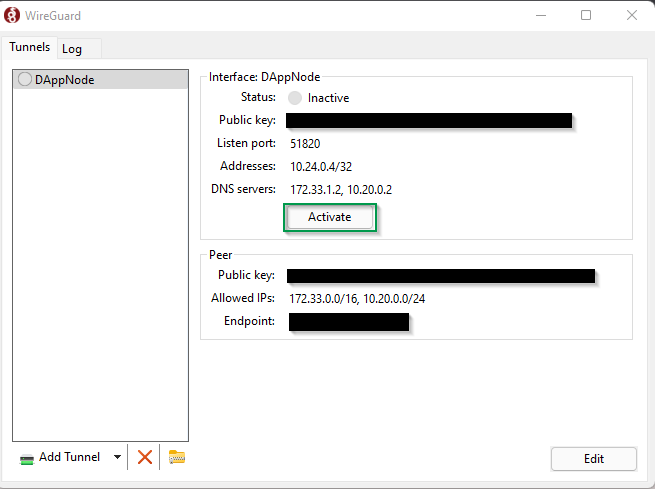
- Once imported, connect to your Dappnode by activating the tunnel.
You can verify your connection status within the WireGuard application. It will display if the tunnel is active, as well as data transfer rates.
4. Connecting to Dappnode via WireGuard
Android
- Launch the OpenVPN for Android app.
- Tap on "+" icon.
- Select the option that fits you best to import the credentials: Scan QR code, Import file or Paste from clipboard to an empty profile.
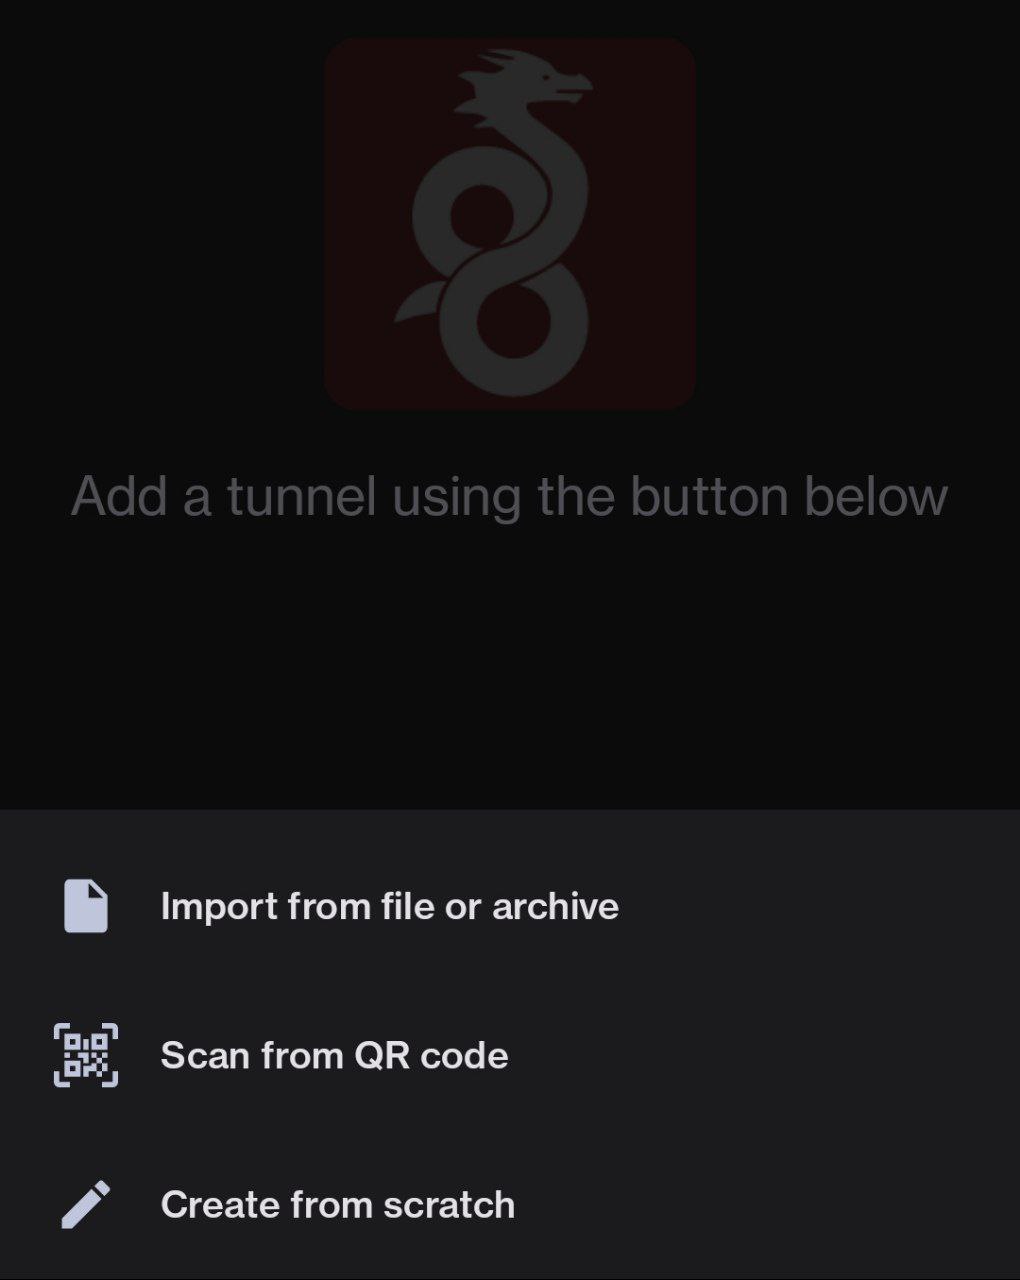
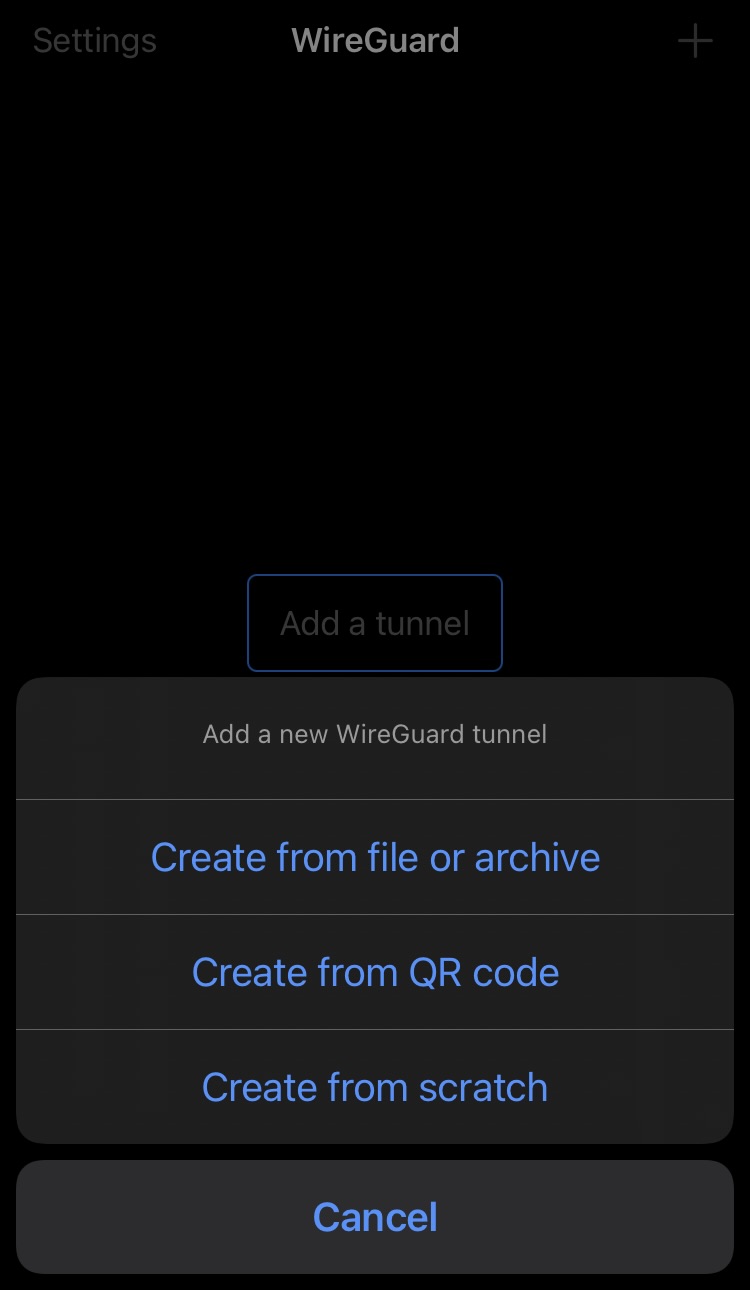
iPhone/iPad
- Launch the OpenVPN for Android app.
- Tap on "Add a tunnel".
- Select the option that fits you best to import the credentials: Scan QR code, Import file or Paste from clipboard to an empty profile.
Linux
- Create a file for your credentials:
sudo nano /etc/wireguard/wg0.conf - Paste your credentials there and save the file (Ctrl+Shift+V, Ctrl+O, Ctrl+X).
- Activate the tunnel:
sudo wg-quick up wg0
To deactivate the tunnel, execute the command: sudo wg-quick down wg0.
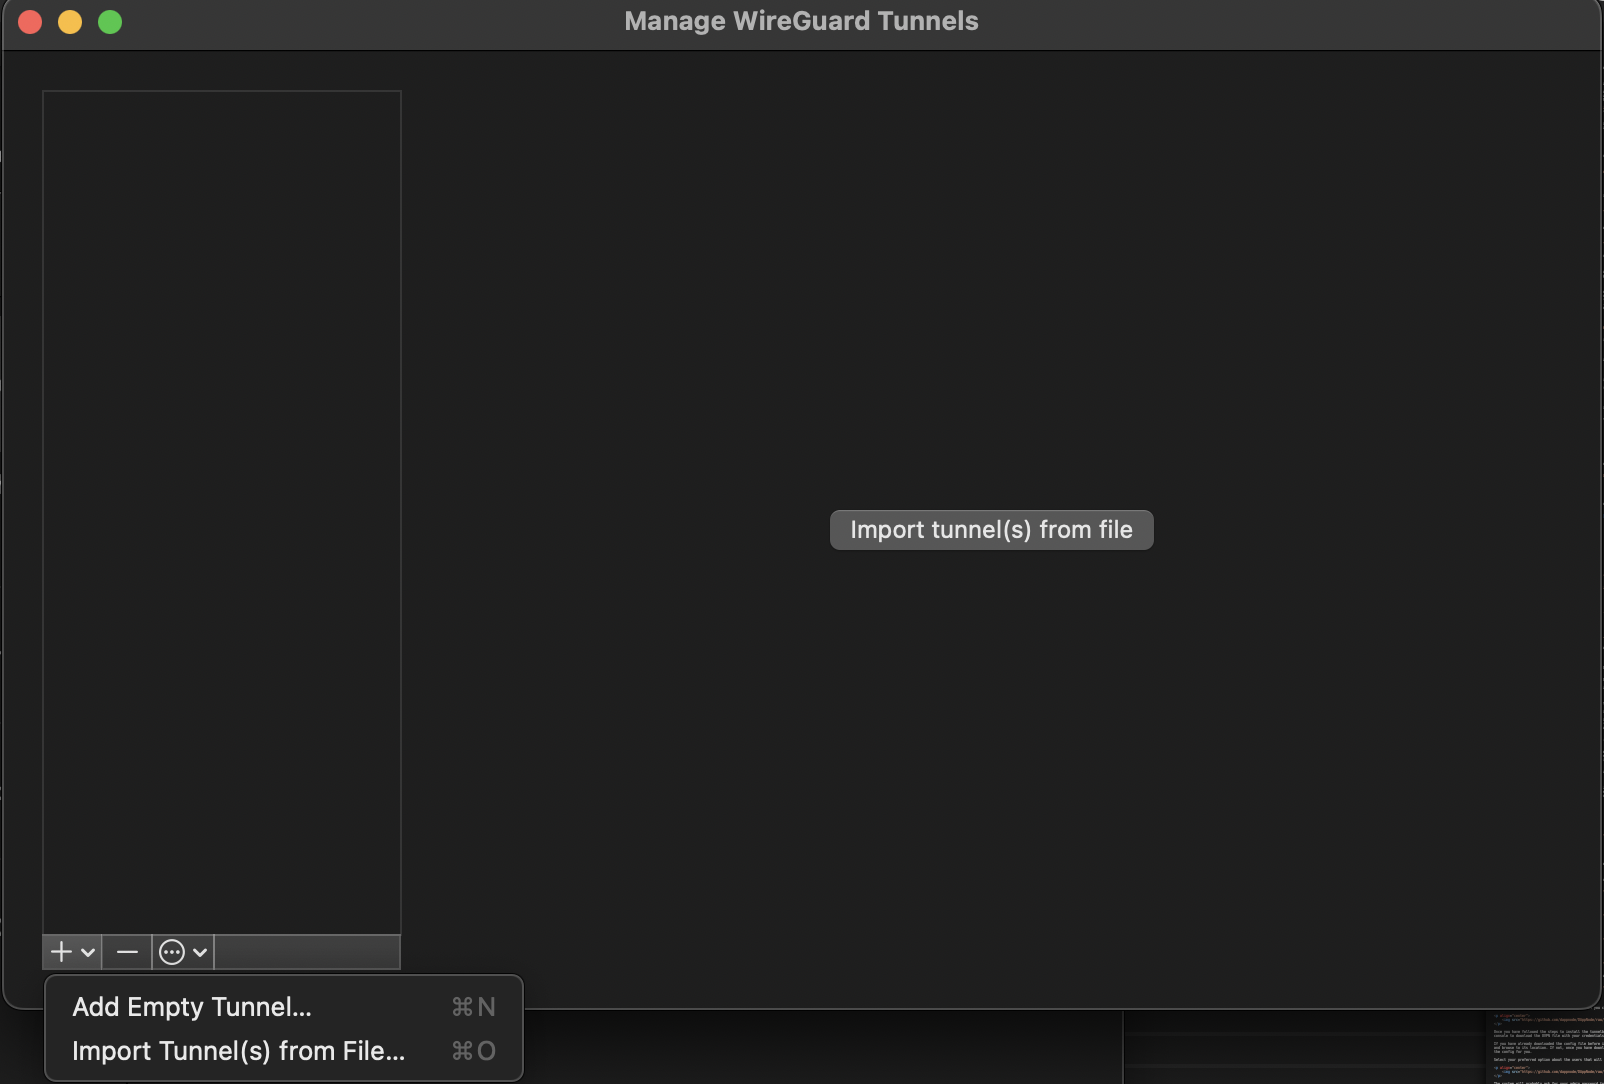
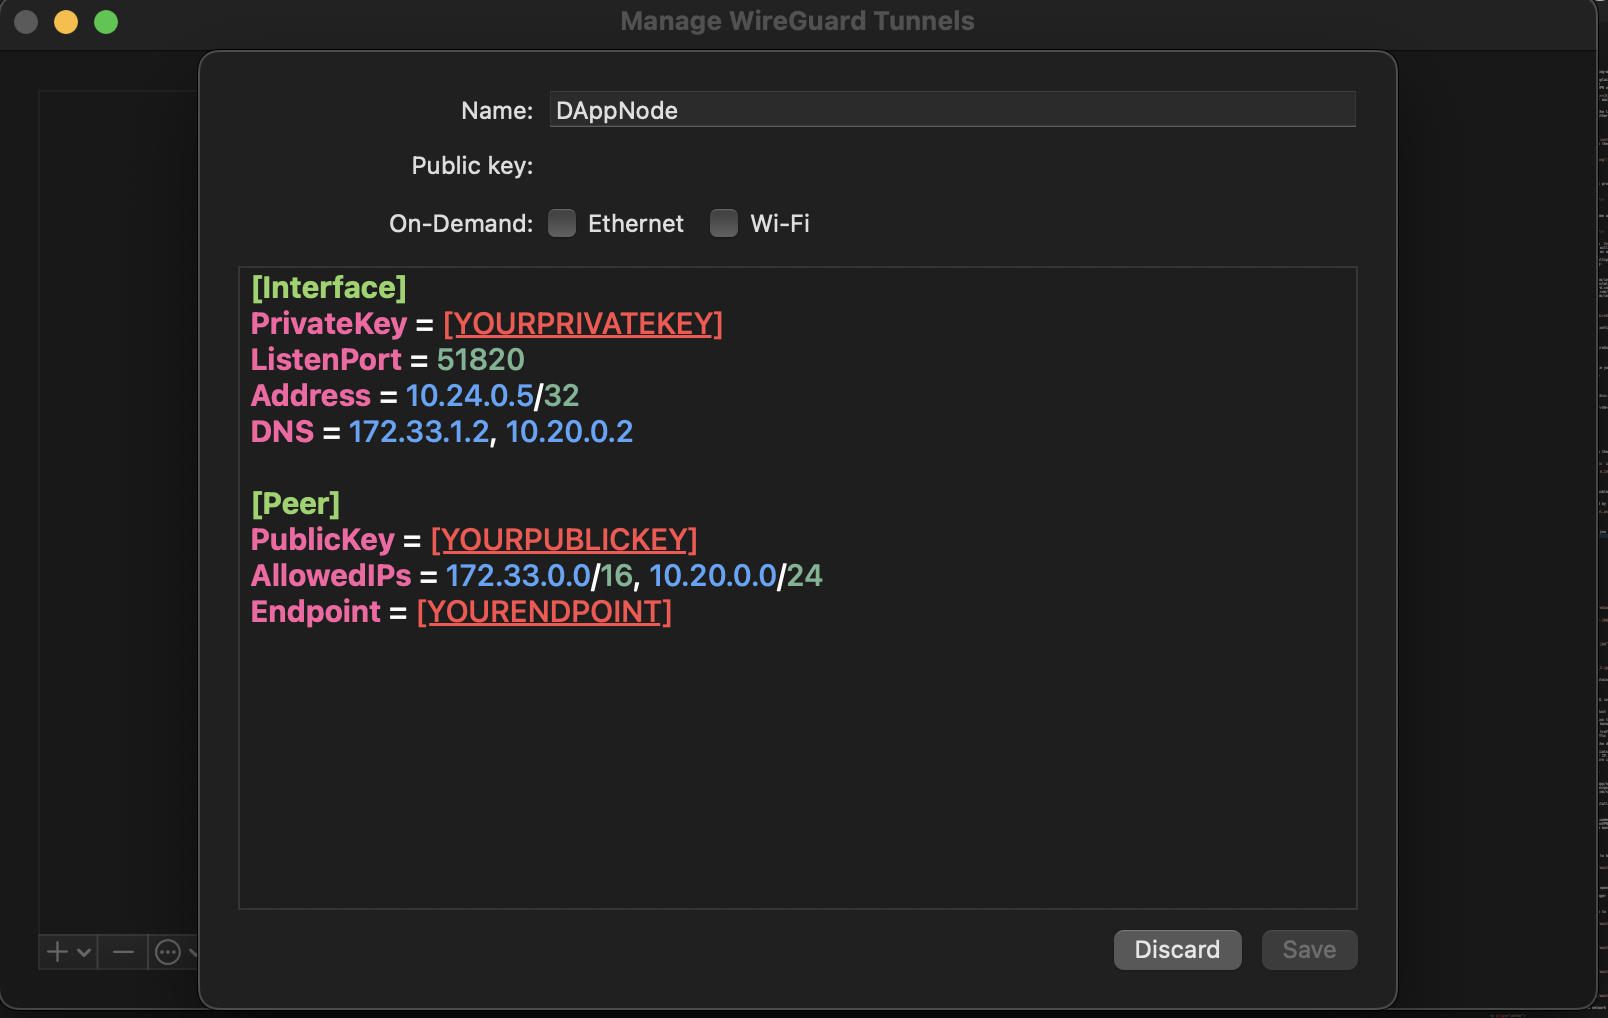
macOS
- In the list of Applications, search for WireGuard and launch it.
- Click on "Manage Tunnels".
- Click on the "+" button.
- Select "Add empty tunnel".
- Paste the credentials you obtained earlier.
- Give a name to this profile and click on "Save".
- Click on "Activate" to connect to your Dappnode.
Windows
- Launch the OpenVPN for Windows app.
- Click on "Add Tunnel".
- Paste the credentials you obtained earlier and save.
- Activate the tunnel.

Once connected, you can directly type http://my.dappnode in your browser to access the Dappmanager.